How Mold Remediation Professionals Vero Beach FL Address Water Damage and Prevent Mold Growth

vero beach mold removal

Water damage is one of the most common issues faced by homeowners and businesses, often with significant consequences if not addressed promptly. Understanding the causes of water damage and its connection to mold growth can help mitigate risks and protect your property.

How a Mold Specialist Vero Beach Can Address Common Causes of Water Damage

  • Plumbing Issues: Leaky pipes, burst pipes, and worn-out plumbing fixtures can allow water to seep into walls, floors, or ceilings.
  • Roof Leaks: Damaged or missing shingles, clogged gutters, or deteriorated flashing can permit rainwater to infiltrate your home.
  • Flooding: Natural disasters like heavy rainstorms or flash floods often lead to severe water damage.
  • Appliance Failures: Malfunctioning appliances such as washing machines, dishwashers, and water heaters can release large amounts of water if they fail.
  • HVAC System Problems: Poorly maintained heating, ventilation, and air conditioning systems may leak moisture over time.
  • Sewer Backups: Blocked or overloaded sewer lines can cause wastewater to back up into your home.

How Water Damage Leads to Mold Growth

  1. Excessive Moisture
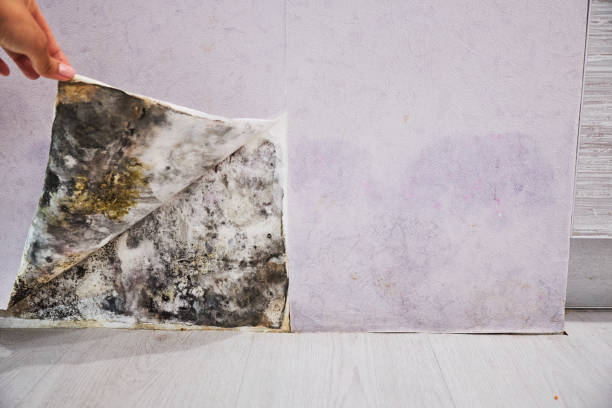
    Mold thrives in damp conditions. When materials like wood, drywall, or carpets absorb excess moisture during a leak or flood, they create a perfect breeding ground for mold.
  2. Humidity Levels Above 60%
    High humidity levels caused by water infiltration encourage condensation on surfaces like walls and windowsills. This contributes further to moisture buildup.
  3. Delays in Drying Efforts
    If wet areas are not dried within 24–48 hours after initial exposure to water damage, mold spores have sufficient time to germinate and spread.
  4. Organic Materials as Food Sources
    Many building materials contain organic substances (e.g., cellulose in wood) that serve as nutrient sources for mold colonies.

Preventive Measures Against Mold After Water Damage

  • Address leaks immediately—whether it’s a dripping pipe or a roof issue.
  • Use dehumidifiers and fans to reduce indoor humidity levels quickly after an incident involving excess moisture.
  • Remove wet materials such as carpets or furniture that cannot be dried adequately within 48 hours.
  • Regularly inspect your home’s plumbing system for signs of potential leaks or corrosion.
  • Ensure proper ventilation in areas prone to dampness (e.g., bathrooms, laundry rooms).
Type of Water Damage Risk Level for Mold Growth Suggested Action
Plumbing Leak Moderate Repair leak promptly; dry area within 48 hours
Roof Leak High Fix damaged roof immediately; check attic insulation
Flooding Very High Seek professional cleanup services; remove standing water quickly
Appliance Failure Moderate Turn off the appliance; address affected areas fast

By understanding common causes of water damage and how they contribute to mold growth risks, property owners can take informed steps toward prevention and mitigation strategies tailored specifically for their circumstances. Always act swiftly when dealing with moisture problems for long-term protection against structural damage and health-related concerns stemming from mold infestations.

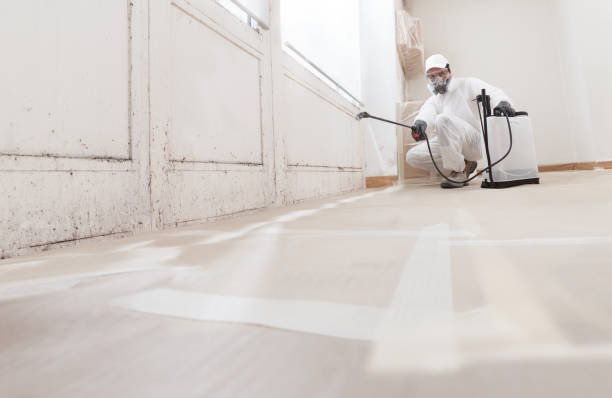
Effective Mold Remediation Vero Beach Services to Tackle Water Damage

Water damage can cause significant problems for homeowners, ranging from structural damage to potential health risks caused by mold growth. Professional water damage cleanup services play a crucial role in mitigating these risks and ensuring your home remains safe and habitable. Below, we’ll explore how these services work and why they are essential for preventing mold infestations.

The Importance of Professional Mold Removal Vero Beach Services

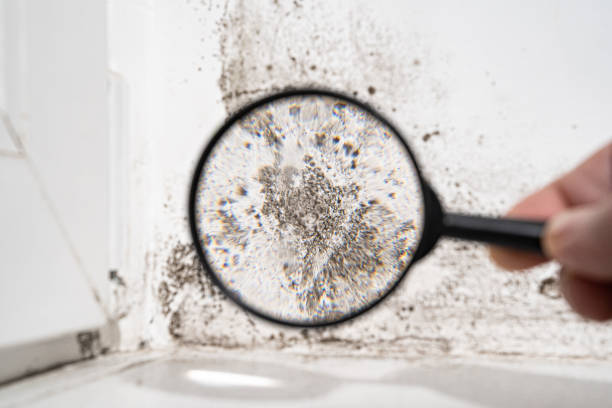
  • Thorough Inspection: Professionals have the tools and expertise to assess the extent of water damage effectively. They can identify hidden moisture behind walls, under floors, or in other hard-to-reach areas that DIY methods often overlook.
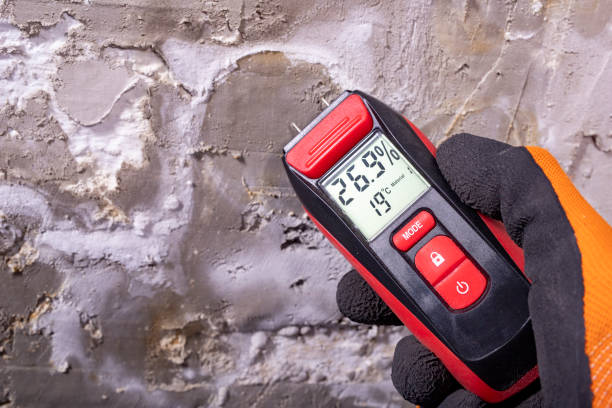
  • Specialized Equipment: Cleanup companies use industrial-grade equipment such as dehumidifiers, air movers, and moisture meters to ensure comprehensive drying of affected areas.
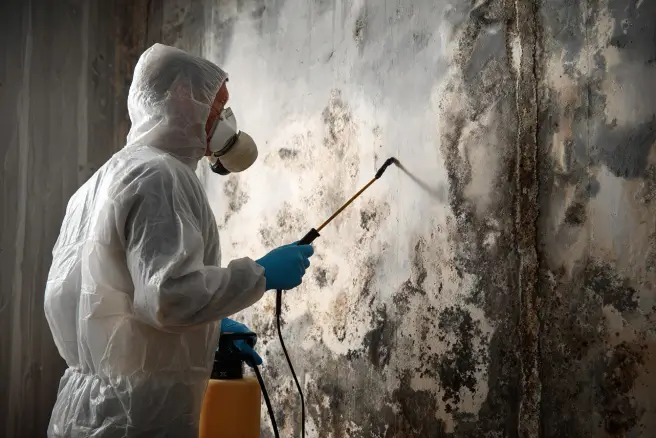
  • Mold Prevention Techniques: Experts understand how to remove excess moisture while applying antimicrobial treatments to inhibit mold growth.
  • Safe Waste Removal: Damaged materials like drywall or carpeting may need removal if they cannot be salvaged. Professionals handle this safely while following industry standards.

What to Expect During a Mold Inspection Vero Beach Process

  1. Identify the source of water (e.g., leaks, floods)
  2. Evaluate the extent of visible and hidden damage
  3. Develop a customized restoration plan
  4. Use pumps or vacuums to remove standing water efficiently
  5. Remove any damaged furniture or materials beyond repair
  6. Deploy high-powered dehumidifiers and fans for thorough drying
  7. Monitor humidity levels over days if necessary
  8. Disinfect affected surfaces using antimicrobial solutions
  9. Clean salvageable personal items like furniture or clothing
  10. Repair damaged structures such as flooring or drywall
  11. Repaint walls if necessary

Why Choosing Professionals for Water Damage Restoration Vero Beach FL is Better Than DIY

Benefit Description
Expertise Professionals understand how different materials react to water exposure
Time Efficiency Quick response reduces the likelihood of secondary issues like mold
Advanced Equipment Access to tools designed specifically for large-scale drying and cleanup
Mold Prevention Proactive measures reduce future risks associated with microbial growth

Finding the Best Mold Remediation Vero Beach FL Has to Offer

  • Certification by organizations such as the Institute of Inspection Cleaning and Restoration Certification (IICRC).
  • Availability for emergency response (24/7 service ensures rapid action).
  • Positive customer reviews highlighting reliability and effectiveness in preventing long-term issues.

By hiring experienced professionals like the team from https://verobeachmoldremoval.com promptly after experiencing water damage, homeowners can prevent costly repairs while avoiding potentially hazardous conditions caused by unchecked mold growth.

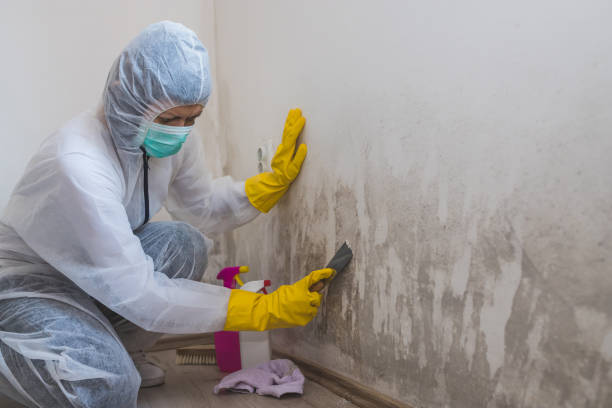
Essential Steps for Effective Vero Beach Mold Remediation After Water Damage

Water damage can cause significant harm to your property and create the perfect conditions for mold growth if not addressed promptly. Taking the right steps immediately after discovering water damage can mitigate further destruction and reduce the risk of mold infestations. Below are six essential steps to follow when dealing with water damage in your home.

1. Ensure Safety First

Before addressing any water damage, prioritize the safety of everyone in your home.
Turn off electricity: Water and electricity are a dangerous combination. Shut off power to affected areas until it’s safe to turn it back on.
Wear protective gear: Use rubber gloves, boots, and masks if you need to assess or clean up the area yourself, especially in cases of contaminated water (e.g., from sewage backups).

2. Identify and Stop the Source of Water

To prevent further damage, locate the source of the water intrusion and stop it as quickly as possible. Common sources include:
– Leaking pipes or appliances (e.g., washing machines or dishwashers)
– Roof leaks caused by storms or damaged shingles
– Flooding from heavy rain or natural disasters

Once identified, shut off your main water supply if necessary. For severe issues such as burst pipes or structural leaks, contact a plumber or professional immediately.

3. Document the Damage for Insurance Purposes

Take photographs or videos of all affected areas before beginning any cleanup efforts. Clearly document visible damage to:
– Floors, walls, and ceilings
– Furniture, appliances, and personal belongings

This will help support your insurance claim when filing for compensation for repairs and replacements.

4. Remove Standing Water

Standing water can exacerbate structural damage and create an environment conducive to mold growth within 24–48 hours. Use tools such as:
– Wet/dry vacuums for small-scale flooding
– Mops and buckets for less severe puddles
For larger flooding situations, consider contacting a professional restoration service equipped with industrial-grade pumps.

Tool/Equipment Use Case
Wet/Dry Vacuum Small puddles or minor leaks
Industrial Pumps Large-scale flooding
Dehumidifiers/Fans Drying out damp areas post-water removal

5. Dry Out Affected Areas

After removing standing water, focus on drying out all damp surfaces thoroughly to prevent mold from growing within hidden spaces like drywall cavities or beneath flooring materials. Steps include: – Use dehumidifiers in humid rooms. – Open windows for ventilation if weather permits. – Run extraction machines alongside blowers/similar devices circulating indoor airflow

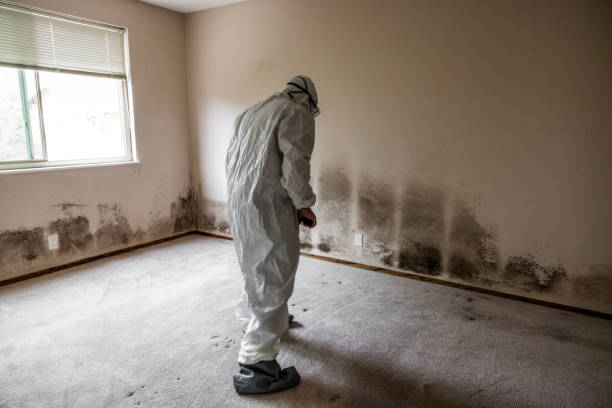
Effective Solutions for Mold Remediation Vero Beach FL and Preventing Water Damage

Water damage in your home can stem from a variety of sources, ranging from natural disasters to household malfunctions. Left unaddressed, even minor water damage can create the perfect environment for mold growth. Mold thrives in damp, humid conditions, making water-damaged areas particularly vulnerable. Understanding the common causes of water damage and their connection to mold is essential for prevention and effective remediation.

Common Causes of Water Damage

  • Leaking Pipes: Corroded or burst pipes can lead to hidden water leaks behind walls or beneath floors. These areas often remain unnoticed until mold has already begun to grow.
  • Roof Leaks: Damaged shingles or poor roof maintenance can allow rainwater to seep into your attic or ceiling spaces, creating wet conditions that promote mold development.
  • Appliance Malfunctions: Washing machines, dishwashers, and refrigerators with faulty seals or clogged drains can cause localized flooding, resulting in moisture accumulation.
  • Flooding from Storms: Heavy rainfall and hurricanes can overwhelm drainage systems and lead to flooding inside your home. Prolonged standing water is a major contributor to mold infestations.
  • Poor Ventilation: Areas like kitchens, bathrooms, and basements are prone to high humidity levels when ventilation is inadequate. This trapped moisture provides ideal conditions for mold spores to grow.

The Link Between Water Damage and Mold Growth

  1. Moisture Retention: Mold requires moisture as a primary growth factor. Wet drywall, carpets, wooden structures, or insulation materials serve as food sources for molds once they come into contact with retained water.
  2. Time Sensitivity: Studies show that mold colonies can begin forming within 24–48 hours after an area has been exposed to water damage.
  3. Temperature Conditions: Most molds grow best in temperatures between 77°F (25°C) and 86°F (30°C), which aligns with many indoor environments affected by water issues.

Preventing Mold After Water Damage

  • Dry affected areas immediately using fans or dehumidifiers.
  • Remove porous materials like carpets that cannot be thoroughly dried within 48 hours.
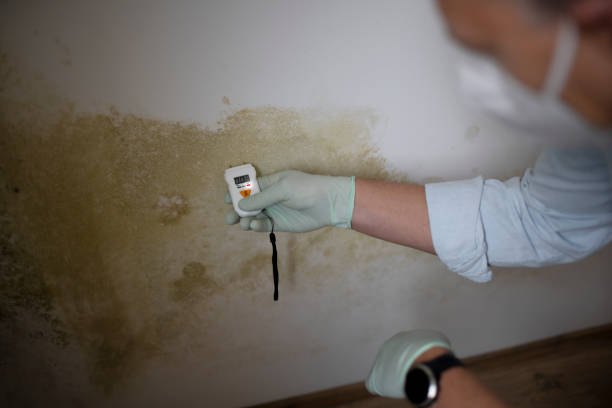
  • Inspect hidden areas such as behind walls or under flooring using moisture meters if necessary.
  • Maintain low indoor humidity levels (ideally under 50%) year-round through proper ventilation systems.
Source of Water Damage Risk Level for Mold Growth Recommended Action
Leaking Pipes High Fix leaks quickly; inspect walls/floors for hidden moisture
Roof Leaks High Patch roof promptly; check attic insulation
Appliance Malfunctions Moderate Repair faulty appliances; ensure floors dry completely
Flooding from Storms Very High Remove standing water immediately; sanitize surfaces
Poor Ventilation Moderate Improve airflow using exhaust fans or dehumidifiers

By understanding these causes and addressing them quickly, you reduce both immediate risks posed by structural damage and longer-term hazards associated with uncontrolled mold growth.

Taking preventative steps now ensures not only the safety but also the longevity of your home’s structural integrity while protecting its occupants’ health from potential respiratory issues caused by exposure to toxic molds like Stachybotrys chartarum (black mold).

How Long Does Mold Removal Vero Beach FL Take and Why Acting Quickly Matters

Water damage restoration is a crucial process that requires prompt action to mitigate further harm to your property and prevent the growth of mold. The timeline for water damage restoration can vary depending on several factors, but acting swiftly is essential in reducing the risks associated with moisture-related issues.

Factors That Affect the Duration of Water Damage Restoration

  1. Minor leaks or small areas of damage may take only 1-2 days to address.
  2. Significant flooding or structural saturation may require several weeks to fully restore.
  3. Clean Water: Easier and quicker to address, typically from broken pipes or rainwater.
  4. Gray Water: From sources like dishwashers or washing machines; requires more cleaning and disinfection due to contaminants.
  5. Black Water: Highly hazardous, often from sewage or flooding; demands extensive remediation efforts and extended drying times.
  6. Porous materials like drywall, carpet, and wood absorb water quickly and may require replacement if severely damaged.
  7. Non-porous surfaces such as tile or metal are easier to dry and restore.
  8. High humidity levels can slow down the drying process while low humidity combined with proper ventilation accelerates it.
  9. The use of professional-grade drying equipment such as dehumidifiers helps achieve quicker results.
  10. Employing modern techniques such as thermal imaging for moisture detection can speed up the assessment phase.
  11. Professional services often use industrial-strength air movers, extraction tools, and antimicrobial treatments, reducing overall restoration time.

Why Immediate Action is Critical

  • Mold can start growing within 24-48 hours in moist environments.
  • Prolonged exposure to moisture allows spores to spread quickly through walls, ceilings, carpets, and furniture.
  • Mold not only compromises indoor air quality but also poses health hazards such as respiratory issues and allergic reactions.

Steps for Fast Restoration

  1. Inspection & Assessment: Conducted by professionals using advanced tools to identify the source and scope of damage.
  2. Water Extraction: Immediate removal of standing water using pumps or vacuums is critical for preventing saturation.
  3. Drying & Dehumidification: Industrial equipment is used to eliminate remaining moisture from surfaces and air.
  4. Cleaning & Sanitizing: Thorough cleaning with antimicrobial treatments helps inhibit microbial growth like mold and bacteria.
  5. Repair & Restoration: Damaged structures are repaired or replaced based on their condition post-drying.
Restoration Step Approximate Timeframe Key Tool/Technique
Initial Inspection 1–3 hours Thermal imaging cameras
Water Extraction 1 day (depending on severity) Pumps/wet vacuums
Drying/Dehumidifying 3–7 days Air movers/dehumidifiers
Cleaning/Sanitizing 1–2 days Antimicrobial solutions
Repairs/Restoration Varies by extent (days – weeks) General construction tools/materials

Benefits of Acting Quickly

By responding promptly to water damage incidents:
– You reduce repair costs by minimizing long-term structural deterioration. – Preventative measures taken early lower health risks due to potential mold exposure. – Faster restoration ensures better preservation of personal belongings like furniture, electronics, or important documents.

Timeliness ensures that both visible damage and less apparent moisture problems are resolved effectively before they escalate into larger concerns such as extensive mold infestations or compromised structural integrity within your home.


Mold Remediation Professionals Vero Beach FL: When to Call Experts Instead of Using a DIY Kit

Mold remediation service: A professional worker spraying products to remove mold before house painting, clad in a protective suit and respirator mask, with a backpack sprayer at a home renovation site Mold remediation service: A professional worker spraying products to remove mold before house painting, clad in a protective suit and respirator mask, with a backpack sprayer at a home renovation site mold removal stock pictures, royalty-free photos & images

Mold is a persistent problem that, if left untreated, can lead to serious health risks and structural damage. While DIY mold removal kits may seem like an affordable solution, there are certain situations where professional intervention is absolutely necessary. Understanding when to call in a specialist can save you time, money, and frustration in the long run.

Extensive Mold Growth

If mold covers a large area (generally more than 10 square feet), it is best to contact a trained professional. Large-scale infestations can often indicate deeper issues, such as hidden moisture leaks or poor ventilation. Professionals have the tools and expertise to locate the root cause of the mold problem rather than simply addressing surface growth.

Signs of extensive mold growth include:
– Patches of discoloration spreading across walls or ceilings
– Mold visible in multiple rooms or areas of the home
– Persistent musty odors throughout your living spaces

Hidden Mold and Structural Concerns

Mold doesn’t always grow in plain sight. It often thrives in hidden spaces such as behind drywall, under flooring, or inside insulation. If you suspect hidden mold but cannot locate it yourself, this is a clear sign you need professional help. Specialists use advanced techniques like infrared cameras and air sampling to detect hidden infestations accurately.

In addition:
– Structural components like wooden beams or floorboards may require replacement if compromised by prolonged exposure to moisture and mold. – Professionals ensure that repairs are completed properly to prevent further contamination.

Health Symptoms Persist Despite Cleaning

DIY kits may temporarily remove surface-level mold but fail to address underlying spores that continue circulating in your home. If family members experience recurring health issues such as coughing, sneezing, itchy eyes, or respiratory problems despite cleaning efforts, it’s time for expert evaluation.

Common health symptoms linked with prolonged exposure include:
– Persistent allergies or asthma flare-ups
– Unexplained skin rashes or irritation
– Chronic fatigue or difficulty breathing indoors

Recent Water Damage

Water damage from leaks, flooding, or burst pipes creates an ideal environment for rapid mold growth. If your property has experienced any recent water-related incidents—especially if they weren’t thoroughly dried within 24-48 hours—you should consult a remediation specialist immediately. Professionals can assess affected areas for potential mold development and take preemptive measures before it spreads.

A timeline of how quickly water damage leads to mold: | Timeframe | Event | |——————–|——————————————-| | Within 24–48 hours | Mold begins colonizing damp areas | | 3–12 days | Visible growth may appear on surfaces | | Beyond 12 days | Mold penetrates deeper into materials |

Inadequate Results from DIY Efforts

If you’ve already attempted DIY solutions without success—or the same problem keeps reappearing—it’s likely due to incomplete removal methods. Store-bought kits cannot match the thoroughness of professional-grade equipment used by certified specialists.

Common limitations of DIY kits include:
– Lack of proper containment methods leading to cross-contamination
– Failure to address airborne spores that linger after cleaning
– Inability to identify underlying moisture issues feeding new growth

When Professional Services Are Essential

  1. Widespread Presence: Affects multiple rooms/large spaces.
  2. Health Complaints: Unexplained physical symptoms persist indoors.
  3. Structural Compromise: Visible deterioration in walls/floorboards.
  4. Recurring Issues: Mold grows back after repeated cleanings.
  5. Special Circumstances: Post-water damage scenarios require immediate expert evaluation.

Knowing when to turn away from a DIY approach protects both your home’s integrity and your family’s well-being over time—ensuring long-term solutions rather than temporary fixes provided by store-bought products geared toward limited cases only.

Understanding the Importance of Mold Remediation Vero Beach for a Safer Home

Mold growth in any property can be a serious issue, but certain types, like black mold (Stachybotrys chartarum) or green molds (such as Aspergillus or Cladosporium species), pose more significant dangers. Understanding these risks is crucial to protecting your home and safeguarding your family’s health.

How to Address Black and Green Mold with Mold Removal Vero Beach

Both black and green molds are capable of causing harm, but the threats they pose differ depending on the species and circumstances.

  • Black mold: Known for producing mycotoxins, which can lead to severe respiratory issues, allergic reactions, and long-term health complications.
  • Green mold: While not all green molds produce toxins, some strains of Aspergillus release harmful mycotoxins that can contaminate surfaces or even food.
  • Allergic Reactions: Both types of mold are notorious for triggering allergies in susceptible individuals. Symptoms may include sneezing, watery eyes, skin irritation, and exacerbation of asthma symptoms.
  • Structural Damage: Beyond health issues, these molds feed on organic materials such as wood and drywall. Left unchecked, they can weaken structures over time.

Comprehensive Guide to Mold Inspection Vero Beach

Not all dark-colored mold is black mold nor are all green molds dangerous. Proper identification is vital before taking any action.

Feature Black Mold Green Mold
Color Dark black or dark greenish-black Shades of green (light to dark)
Texture Slimy when wet; powdery when dry Velvet-like or powdery
Odor Strong musty smell Mild musty odor
Typical Growth Areas Damp areas like basements Bathrooms, HVAC systems

If you’re unsure about the type of mold present in your house, consider consulting a professional for accurate identification.

Understanding Health Risks from Prolonged Exposure During Water Damage Restoration Vero Beach FL

  • Persistent coughing
  • Wheezing
  • Difficulty breathing
  1. Neurological Effects (from mycotoxin exposure):
    • Headaches
    • Memory loss
    • Fatigue
    • Susceptible individuals may experience infections caused by some strains like Aspergillus fumigatus.
    • People with asthma or other pre-existing conditions may face aggravated symptoms due to prolonged exposure.

When Should You Act on Mold Remediation in Vero Beach FL

  • The affected area exceeds 10 square feet.
  • You notice recurring growth despite cleaning.
  • There’s an overwhelming musty smell that persists.
  • Someone at home experiences unexplained respiratory symptoms regularly.
  • DIY methods might suffice for minor cases but always use personal protective equipment (PPE) like gloves and masks during cleanup.

Addressing these potential dangers early ensures that your living environment remains safe while minimizing costly damages over time.

How Vero Beach mold remediation Can Address Serious Mold Problems After Water Damage

Water damage in your home, whether from a flood, burst pipe, or roof leak, can create the perfect environment for mold growth. Understanding why recent water damage is a catalyst for mold problems is essential in addressing the issue effectively and preventing further complications.

The Connection Between Water Damage and Mold Growth

Mold thrives in environments that provide:
Moisture: Even small amounts of lingering water or humidity can support mold growth.
Organic Material: Mold feeds on materials like wood, drywall, carpet fibers, and even dust.
Time: Under the right conditions, mold spores can start growing within 24 to 48 hours after water exposure.

When water damage occurs indoors, these factors often align to create an ideal setting for mold to proliferate. If not addressed quickly and thoroughly, the consequences can escalate.

Common Sources of Water Damage That Lead to Mold

Some typical scenarios that may result in serious mold problems include:
1.Leaking Pipes:A slow leak behind walls or under sinks often goes unnoticed until major damage has occurred.
2.Roof Leaks:Water infiltrating through damaged shingles or flashing can lead to hidden mold growth in attics.
3.Flooding:Whether from a natural disaster or plumbing issue, standing water introduces significant moisture into building materials.
4.Condensation Issues:Poor ventilation in areas like bathrooms or basements can cause moisture buildup that fosters mold development.

The Risks of Neglecting Mold After Water Damage

Failing to address water damage quickly leads to several risks: – Structural Complications: Mold can weaken building materials over time by breaking them down.Health Concerns: Prolonged exposure to mold may cause respiratory issues, allergic reactions, and other health problems.Higher Costs: Delaying remediation often results in more extensive repairs down the line as both the mold and its root causes spread.

Steps To Prevent Mold After Water Damage

Acting promptly after water damage is critical for reducing the likelihood of serious mold issues: 1.Remove Standing Water:Use pumps or wet/dry vacuums to eliminate visible water as soon as possible. 2.Dry Affected Areas Thoroughly:Employ dehumidifiers and fans for at least 48–72 hours to ensure complete drying. 3.Inspect Hidden Spaces:Check behind walls, under floors, and inside cabinets where moisture may remain trapped. 4.Disinfect Surfaces:Clean non-porous materials with an antimicrobial solution designed to kill spores. 5.Replace Damaged Materials If Necessary:Porous items like drywall and carpets may need removal if they were heavily saturated.

Material Timeframe for Drying Recommended Action if Wet
Drywall 24–48 Hours Remove if swelling occurs
Carpet 1–2 Days Professionally clean or remove if heavily soaked
Hardwood Several Days Dry gradually; avoid rapid heat application

Professional Assistance May Be Needed

In cases where water damage extends over large areas or persists beyond a few days without remediation efforts, hiring a professional could be necessary. A specialist has access to tools like infrared cameras for detecting hidden moisture and industrial-grade equipment for thorough drying.

By addressing recent water damage comprehensively and immediately implementing preventative measures, homeowners can significantly reduce the likelihood of long-term issues caused by unchecked mold growth.

Effective Mold Remediation Vero Beach FL: Ensuring Safe Air Quality in HVAC Systems

Mold in HVAC systems can severely impact indoor air quality and pose serious health risks. Since HVAC systems circulate air throughout your home, any mold present within the system can spread spores to every room. This makes addressing mold in these systems a priority for maintaining a safe and healthy environment. Below, we’ll explore the steps you need to take to identify, address, and prevent mold in your HVAC system.

Man with nose mouth protection measures the moisture level on a wall with mildew Man with nose mouth protection measures the moisture level on a wall with mold in an apartment mold removal stock pictures, royalty-free photos & images

Common Signs of Mold in HVAC Systems

Identifying mold in your HVAC system early can help prevent widespread contamination.

  • Musty Odors:A persistent musty or damp smell when the system is running.
  • Visible Growth:Dark spots or fuzzy patches near vents, drip pans, or ducts.
  • Increased Allergies:Residents experiencing unexplained allergy symptoms such as sneezing, coughing, or itchy eyes.
  • Condensation Issues:Excess moisture around ductwork or on walls near vents.
  • Discolored Air Filters:Filters with black or green discoloration might indicate mold presence.

Step-by-Step Process for Addressing Mold in Your HVAC System

Addressing mold requires careful handling to ensure safety and thorough removal.

  1. Prevent further spore circulation by shutting down the HVAC immediately.
  2. Check components prone to mold growth, including drip pans, ductwork, coils, and filters.
  3. Dispose of old filters safely by sealing them in plastic bags before discarding.
  4. Install high-efficiency particulate air (HEPA) filters as replacements.
  5. Use an EPA-approved antimicrobial cleaner on non-porous surfaces like metal ducts and coils.
  6. Avoid bleach on porous materials such as fiberglass-lined ducts; it may not fully eliminate spores.
  7. Ensure drain lines are clear and functioning properly.
  8. Fix leaks or condensation issues contributing to excess moisture.
  9. For extensive contamination or severe health concerns, hire a certified mold remediation specialist.

Preventive Measures to Keep Mold Out of Your HVAC System

Measure Description
Regular Maintenance Schedule annual inspections and cleaning by qualified HVAC technicians.
Control Humidity Levels Keep indoor humidity between 30–50% using dehumidifiers if necessary.
Replace Air Filters Frequently Change filters at least every 1–3 months based on usage and manufacturer guidelines.
Check Drain Lines Ensure they remain clear of debris and properly drain condensation water.
Seal Ductwork Repair gaps or cracks that could allow moisture buildup within the system.

Why Professional Assistance May Be Necessary

  • Professionals use advanced tools like negative air machines and specialized biocides.
  • They can assess hidden areas where mold may thrive (e. g. , behind walls near ductwork).
  • Proper testing ensures complete remediation without leaving residual spores behind.

By addressing mold in your HVAC system promptly and following preventive measures, you protect both your home environment and the health of its occupants from long-term hazards associated with poor indoor air quality.

Effective Solutions for Mold Removal Vero Beach FL: Why It Keeps Returning and How to Stop It

Mold growth can be a persistent and frustrating issue for homeowners. Even after a thorough cleaning or professional removal, mold may return if the underlying causes are not addressed. Below, we explore the factors that contribute to recurring mold problems and strategies to prevent them from resurfacing.

Common Causes of Recurring Mold Growth

  1. High humidity levels or lingering dampness create an ideal environment for mold spores to thrive.
  2. Leaks in plumbing, roofing, or windows often go unnoticed but continuously feed moisture into problem areas.
  3. Bathrooms, basements, and kitchens with inadequate airflow trap humid air, encouraging mold growth over time.
  4. Surface-level cleaning may address visible mold but fail to remove hidden spores embedded in porous materials like drywall or wood.
  5. Failing to identify the root cause of moisture allows the problem to persist even after cleaning efforts.

Steps to Prevent Mold From Returning

  • Fix Moisture Problems Early
    Identify and repair any sources of water intrusion:
    | Problem Source | Suggested Fix |
    |————————–|———————————————|
    | Leaky roof | Repair shingles or replace flashing |
    | Plumbing leaks | Replace damaged pipes or joints |
    | Cracks in foundation | Seal cracks using waterproofing solutions |
  • Control Indoor Humidity
    Keep indoor humidity below 50% by using tools such as:

    • Dehumidifiers in damp rooms like basements.
    • Exhaust fans in bathrooms and kitchens during use.
    • Air conditioners that regulate overall indoor temperature and humidity.
  • Improve Ventilation
    Promote air circulation by opening windows when weather permits and ensuring HVAC systems are functioning properly.
  • Use Mold-Resistant Materials During Renovations
    If you’re remodeling areas previously affected by mold:

    • Opt for mold-resistant drywall or paint for high-moisture zones.
    • Apply sealants on wood surfaces prone to exposure.

Professional Assistance May Be Necessary

If DIY efforts don’t resolve persistent mold issues, it could indicate a deeper problem requiring professional remediation services.

  • Conduct a thorough inspection to pinpoint hidden moisture sources.
  • Use advanced techniques like HEPA vacuuming and antimicrobial treatment.
  • Remove affected materials safely without spreading spores further.

Recurring mold is more than just an annoyance; it can negatively impact both your property value and health over time if left unchecked. By addressing root causes such as excess moisture, poor ventilation, or untreated sources, you can establish a healthier indoor environment free from recurring mold problems.

Discover How a Mold Specialist Vero Beach Can Address Health Risks in Your Home

Mold is a common household issue that, if left unaddressed, can lead to significant health risks. Prolonged exposure to mold doesn’t just jeopardize the structural integrity of your home; it also poses serious threats to the well-being of those living in it. Understanding these risks is critical for protecting your health and ensuring a safe living environment.

Respiratory Problems Linked to Mold Exposure

One of the most common health issues associated with mold exposure is respiratory distress.

Individuals with pre-existing respiratory conditions are particularly vulnerable, but anyone exposed to high levels of mold spores over a prolonged period can develop these symptoms.

Allergic Reactions Caused by Mold

Mold can act as an allergen for many individuals, triggering allergic reactions even in people without prior sensitivities.

  • Itchy or red eyes
  • Skin irritation such as rashes or hives
  • Runny nose and sinus congestion
  • Frequent headaches

If you notice these symptoms worsening while at home but improving when you leave, mold could be the culprit.

Not all molds are created equal.Stachybotrys chartarum(commonly referred to as black mold), produce mycotoxins that can have toxic effects on humans and animals.

Health Issue Potential Impact
Neurological Symptoms Memory loss, difficulty concentrating, dizziness
Immune System Suppression Increased susceptibility to infections
Chronic Fatigue Persistent tiredness unrelated to activity levels

Children, pregnant women, and individuals with weakened immune systems are particularly at risk from toxic mold exposure.

Mental Health Impacts of Living with Mold

The presence of mold doesn’t just affect physical health—it also takes a toll on mental well-being. Studies have linked prolonged exposure to damp environments and visible mold growth with increased anxiety and depression rates. This may be due to both physiological responses triggered by mycotoxins and the stress caused by living in an unhealthy environment.

Preventing Long-Term Health Risks

  1. Act promptly: Address water damage immediately before it leads to mold growth.
  2. Improve ventilation: Use exhaust fans and dehumidifiers in areas prone to moisture buildup.
  3. Monitor humidity levels: Maintain indoor humidity below 50% where possible.
  4. Seek professional help: Large-scale infestations require the expertise of certified specialists.

The health risks associated with ongoing mold issues underscore the importance of prompt remediation efforts paired with preventive maintenance strategies for your home’s air quality and overall safety.

When to Call a Mold Remediation Specialist: Musty Smells, Large Areas, and Visible Growth

Knowing when to reach out to a professional mold remediation specialist can save you time, money, and prevent potential health risks. While DIY mold removal kits may seem appealing for minor issues, there are specific signs that indicate the need for expert intervention. Below are key scenarios where calling in a professional is the best course of action.

Woman is cleaning A lot of Black mold fungus growing on the windowsill at home. Dampness problem concept. Condensation on the window. Woman is cleaning A lot of Black mold fungus growing on the windowsill at home. Dampness problem concept. Condensation on the window. mold removal stock pictures, royalty-free photos & images

Persistent Musty Smells

A consistent musty odor in your home or building is often an early indicator of hidden mold growth.

Attempting to mask these odors with air fresheners or cleaning sprays won’t solve the underlying issue. Professional remediation specialists have advanced equipment like moisture meters and infrared cameras to identify hidden mold sources without unnecessary property damage.

Large Areas of Mold Growth

The Environmental Protection Agency (EPA) advises homeowners that mold affecting more than 10 square feet should not be handled as a DIY project. Dealing with large infestations requires specialized tools and containment procedures to prevent spores from spreading further into your home or contaminating clean areas.

  1. Specialists seal off affected spaces using plastic sheeting and negative air pressure systems to stop cross-contamination.
  2. High-efficiency particulate air (HEPA) vacuums and antimicrobial treatments ensure thorough removal of both surface mold and microscopic spores.
  3. Professionals handle contaminated materials safely according to local regulations for hazardous waste disposal.

Visible Mold in Multiple Locations

If you notice visible patches of mold growing in several areas of your home—especially different rooms—it points to a widespread moisture or ventilation problem that requires expert diagnosis and treatment.

  • Bathroom ceilings and grout lines
  • Basement walls or crawl spaces
  • HVAC vents
  • Window sills

Trying to clean multiple colonies without addressing the root cause often leads to recurring issues, which could worsen over time.

Additional Indicators That Call for Professional Help

Indicator Why You Shouldn’t DIY
Repeated Outbreaks Mold returning after DIY cleaning suggests unresolved moisture sources like leaks or high humidity levels.
Health Symptoms Persistent allergies, asthma attacks, or respiratory problems among household members may be tied directly to airborne spores from untreated mold growth.
Structural Damage Mold can weaken wood, drywall, and other building materials over time if left untreated by professionals who specialize in restoration efforts.

Benefits of Hiring a Specialist

  • Comprehensive inspection services identify all problem areas.
  • Proper remediation practices ensure safety throughout every step.
  • Post-removal testing confirms that spore levels are within safe limits before concluding work.

If you encounter musty smells, substantial patches of growth, or recurring outbreaks despite previous cleanup attempts, these situations merit contacting a trusted remediation specialist immediately for evaluation and treatment plans tailored specifically for your needs.


Mold Remediation Vero Beach: What It Is and Why It’s Important

Female worker of cleaning service removes mold from wall using spray bottle with mold remediation chemicals and scraper tool. Female worker of cleaning service removes mold from wall using spray bottle with mold remediation chemicals, mold removal products and scraper tool. mold removal stock pictures, royalty-free photos & images

While mold plays an essential role in breaking down organic matter in nature, its presence inside homes or buildings can be problematic.

Effective Vero Beach Mold Remediation Solutions for a Healthier Home

Mold growth inside your home is more than just an aesthetic issue. It can cause structural damage to your property and pose significant risks to your health.

Structural Impacts of Mold Growth:
  • Damage to building materials:Mold feeds on organic materials like wood, drywall, and fabrics, weakening their structure over time.
  • Compromised insulation:Mold may infiltrate insulation materials, reducing their efficiency.
  • Stains and discoloration:Surfaces affected by mold often show unsightly stains that are difficult to remove without proper cleaning.
Indoor Air Quality Concerns:
  • Mold releases spores into the air that can trigger respiratory issues when inhaled.
  • Certain molds produce mycotoxins, which can contribute to more severe health problems over time.

Effective Mold Remediation Vero Beach FL: Understanding Common Causes of Mold Growth

To effectively prevent or eliminate mold, it’s essential to understand what conditions allow it to thrive.
Excess moisture:Leaky pipes, roof leaks, or poor ventilation create optimal conditions for mold growth.
High humidity levels:Indoor humidity above 60% provides the perfect breeding ground for mold spores.
Flooding or water damage:Even small amounts of lingering water after flooding can lead to significant mold infestations if not properly addressed.
Poor ventilation:Bathrooms, kitchens, basements, and crawl spaces often have limited airflow, making them prime areas for mold development.

Effective Tips for Mold Removal Vero Beach FL Residents Should Know

Once established in one area of your home, mold can quickly spread through: 1. Airborne spores traveling to other damp areas. 2. Contaminated surfaces coming into contact with clean ones. 3. HVAC systems dispersing spores throughout the property.

Factor Impact on Mold Growth
Moisture level Creates the environment needed for growth
Air circulation Poor airflow allows spores to settle
Organic materials Provides food source for mold

How a Mold Specialist Vero Beach Can Help You Address Mold Promptly

The longer you ignore a developing mold problem, the worse it becomes—not only because it spreads but because remediation becomes more expensive as infestations grow larger. Proactively identifying and addressing water issues as soon as they occur is key to minimizing risk.

By understanding what causes mold and why it’s an issue for both your home and health, you’ll have a solid foundation for taking effective action against this common household problem.

Expert Tips from Mold Remediation Professionals Vero Beach FL: Identifying Signs of Mold in Your Home

Identifying mold early is crucial to mitigate risks and prevent further damage.

Common Signs of Mold

  • Musty Odors: One of the most noticeable indicators is a damp, musty smell, particularly in basements or poorly ventilated areas.
  • Visible Growth: Mold may appear as black, green, white, or gray patches on walls, ceilings, or floors. It often has a fuzzy or slimy texture.
  • Discoloration: Stains or discoloration on walls and ceilings (often yellowish or brown) may indicate water damage that has fostered mold growth.
  • Peeling Paint or Wallpaper: Bubbling or peeling paint can result from moisture buildup behind walls where mold thrives.
  • Health Symptoms: If residents experience unexplained respiratory issues such as coughing, sneezing, irritated eyes, or worsened asthma symptoms when at home, it might signal hidden mold.

Hidden Areas Where Mold May Grow

Mold is not always visible. It can thrive in hidden spaces where moisture accumulates.

Area Potential Causes
Under sinks Leaky pipes or condensation
Behind drywall Water intrusion from roof leaks
Inside HVAC systems Moisture buildup due to condensation
Around windows Improper sealing leading to water seepage
Under carpets Spills or leaks that remain untreated

Regularly inspecting these areas can help you detect any potential mold growth before it spreads.

  1. Look for discoloration on walls and ceilings.
  2. Check for signs of water damage near plumbing fixtures.
  3. Identify rooms with consistent musty odors.
  4. Purchase an affordable kit from a hardware store that includes petri dishes designed to capture airborne spores.
  5. A certified professional can take air samples from your home to detect elevated levels of mold spores.
  6. Use a hygrometer to monitor indoor humidity levels (ideal levels are 30–50%).
  7. Repair any sources of leaks immediately.

Preventing Further Spread

  • Ventilate rooms properly by ensuring good airflow through windows and fans.
  • Use dehumidifiers in damp spaces such as basements.
  • Fix leaks promptly and clean up spills immediately.

Identifying the problem early through these methods will help ensure proper steps are taken toward remediation while safeguarding your home’s integrity and your family’s health.

Home Mold Remediation Stock photo of mold and mildew damage from a leaking roof. mold removal stock pictures, royalty-free photos & images

Effective Mold Removal Vero Beach: Common Signs and How to Identify Them

Identifying its presence early on is crucial for timely remediation.

Common Signs of Mold in Your Home

Mold can manifest in different ways depending on the type, location, and severity of the infestation.

  • It may look like a cluster of tiny dots or larger patches with irregular shapes.
  • A persistent damp or unpleasant musty smell is one of the most noticeable indicators of mold growth.
  • These odors are often strongest in enclosed spaces like basements or under sinks.
  • Past water leaks or discoloration on walls and ceilings are breeding grounds for mold.
  • Look for peeling paint, warped wood, or soft drywall in areas previously exposed to moisture.
  • Unexplained allergic reactions such as sneezing, coughing, itchy eyes, skin irritation, and headaches could indicate mold exposure.

Where to Look for Mold

  1. Check around bathtubs, showers, sinks, grout lines between tiles, and under cabinets.
  2. Inspect behind appliances (e. g. , refrigerators), under sinks where leaks might occur, and inside pantry areas where food spills might promote growth.
  3. Look at foundation walls for moisture seepage as well as around HVAC units that may accumulate condensation.
  4. Pay attention to roof leaks leading to stained wood beams or insulation materials harboring hidden mold colonies.
  1. Use At-Home Test Kits
  2. Collect samples using swabs from suspected surfaces.
  3. Mail them for lab analysis if required (some kits include lab testing fees).
  4. Hire a Professional Inspector
  5. Thermal imaging cameras detect hidden moisture pockets behind walls.
  6. Air quality testing measures spore concentrations throughout your home.
  7. DIY Humidity Monitoring
    Invest in a digital hygrometer:
  8. Maintain indoor humidity below 50% since higher levels encourage mold spread.
Suspected Area Tools Required Steps To Inspect
Bathroom Flashlight Focus on grout lines & under cabinets
Basement/Crawlspace Hygrometer/Thermal Camera Search for condensation near HVAC pipes
Kitchen Swab Kit Check sink cupboards & behind appliances
Attic Flashlight Examine wooden beams & insulation

Next Steps After Identification

Once you’ve confirmed the presence of mold: – For small-scale infestations (less than 10 square feet): Consider DIY cleanup methods with appropriate safety precautions such as gloves and masks. – For larger infestations involving structural damage or black mold (Stachybotrys chartarum): Seek professional remediation services immediately.

By regularly inspecting your home for these signs and addressing potential issues proactively, you can safeguard your home from extensive damage while protecting your household’s health.

Understanding Mold Inspection Vero Beach: Common Types of Household Mold and Their Potential Dangers

Understanding the various types of mold that can grow in your home is essential for effective mitigation and health protection. While mold plays a natural role in breaking down organic materials outdoors, its presence indoors can lead to significant health issues and structural damage. Below are some common types of household mold, their characteristics, and the dangers they pose.

  • Appearance: Typically green, yellow, or black in color with a powdery texture.
  • Common Locations: Found on food items, HVAC systems, walls, or damp floors.
  • Can trigger allergies such as sneezing, coughing, or itchy eyes.
  • Produces mycotoxins that may lead to more severe respiratory conditions with long-term exposure.
  • Appearance: Black or olive-green with a suede-like texture.
  • Common Locations: Grows on carpets, wallpaper, fabrics, and wood surfaces.
  • Causes skin irritation and respiratory problems such as asthma or sinus infections.
  • Particularly harmful for individuals with compromised immune systems.
  • Appearance: Dark green or black with a slimy texture when wet.
  • Common Locations: Thrives on materials like wood, paper, drywall, and insulation that have been exposed to moisture for extended periods.
  • Known for producing harmful toxins that cause severe respiratory distress.
  • Linked to chronic fatigue, headaches, and even neurological effects in extreme cases.
Type Appearance Common Locations Health Risks
Aspergillus Green/yellow/black Food items, HVAC systems Allergies; respiratory conditions
Cladosporium Black/olive-green Carpets, fabrics Skin irritation; asthma
Stachybotrys Dark green/black Wood/drywall exposed to water Severe respiratory distress; neurological issues
  • Appearance: Blue or green with a velvety surface.
  • Common Locations: Found on water-damaged furniture, carpets, insulation materials.
  • Contributes to allergic reactions like sinusitis and inflammation.
  • Certain species produce mycotoxins linked to long-term health risks.

How Household Mold Impacts Structural Integrity

Beyond health risks, mold can weaken the structural integrity of your home by breaking down organic materials like wood and drywall over time. This can result in costly repairs if the issue isn’t addressed promptly.

Key Actions for Mitigating Mold Risks

To reduce exposure to these common molds: 1. Keep humidity levels in your home below 50%. 2. Fix any leaks in roofs or pipes as soon as they’re discovered. 3. Use an air purifier with HEPA filters if necessary. 4. Regularly clean areas prone to moisture build-up such as bathrooms and basements.

Understanding the various types of household mold helps homeowners address potential dangers proactively while protecting both their property and health effectively.

Step-by-Step Guide and Safety Tips for Water Damage Restoration Vero Beach FL

Removing mold from your home can be a manageable task if approached with proper preparation and safety measures. This guide provides effective steps for DIY mold removal while ensuring your health and environment are protected.

Safety Precautions Before Getting Started

Before tackling mold, it’s essential to prioritize safety. Mold spores can become airborne during cleaning, potentially causing respiratory or skin irritation.

  • A NIOSH-approved N95 respirator mask to protect against inhaling spores.
  • Gloves made of rubber, latex, or nitrile to prevent skin contact.
  • Open windows and doors in the affected area to increase airflow.
  • Use fans carefully; they may spread mold spores if not strategically placed.
  • Seal off the work area with plastic sheeting.

Tools and Materials You’ll Need

Having the right equipment makes the process more efficient and effective.

Tools Cleaning Solutions
Scrub brushes or sponges Commercial mold remover
Spray bottles White vinegar
Buckets Hydrogen peroxide (3%)
Cloths or disposable rags Dish soap
HEPA vacuum (optional) Baking soda

Step-by-Step Guide for Mold Removal

  1. g. , discoloration, musty odors).
  2. Use a moisture meter if necessary to detect hidden damp areas.
  3. Remove any furniture or items near the affected zone.
  4. Lay down plastic sheeting on floors to catch debris during cleaning.
  5. Address Small Mold Patches (<10 sq ft): For small growths on hard surfaces like tiles or glass:
  6. Spray a solution of white vinegar onto the affected area.
  7. Let it sit for at least an hour before scrubbing with a brush.
  8. Apply hydrogen peroxide and allow it to sit for 15 minutes before gently scrubbing.
  9. Tackle Larger Growth (>10 sq ft): If larger areas are infested:
  10. Use commercial-grade antifungal solutions designed for extensive growth.
  11. Work in sections to avoid spreading debris across unaffected areas.
  12. Clean Up Thoroughly: After scrubbing away visible mold:
  13. Wipe surfaces with damp cloths dipped in soapy water.
  14. Rinse thoroughly with clean water and dry completely using fans or dehumidifiers.
  15. Dispose of Contaminated Materials: Safely discard heavily infested items such as carpets, drywall, or insulation in sealed plastic bags.

Preventing Future Mold Growth

  • Keep humidity levels below 50% by using dehumidifiers.
  • Fix leaks in roofs, pipes, or walls promptly.
  • Clean gutters regularly to prevent water damage to structural components.
  • Ventilate bathrooms and kitchens adequately by using exhaust fans during use.

By following this guide carefully, you can effectively manage minor infestations while keeping your space safe and healthy. However, if at any point the problem seems extensive or poses health risks beyond your comfort level, consider consulting a professional service for assistance.

Home Mold Remediation Stock photo of mold and mildew damage from a leaking roof. mold removal stock pictures, royalty-free photos & images

When to Call for Mold Remediation Vero Beach FL and Why It’s Important

Mold can be a persistent and hazardous issue in homes, and while DIY methods can sometimes address minor infestations, there are situations where hiring a professional mold removal service becomes necessary. Understanding when to involve experts is crucial for protecting your health, maintaining your property’s integrity, and ensuring comprehensive remediation. Below are some key considerations for when it is appropriate to call in professionals and why their expertise is critical.

Situations That Require Professional Mold Removal Services

  1. If mold covers an area larger than 10 square feet (approximately 3 feet by 3 feet), the Environmental Protection Agency (EPA) recommends consulting professionals. Large-scale infestations often indicate deeper moisture problems that require advanced techniques to resolve.
  2. Mold that keeps returning despite repeated cleaning efforts suggests underlying issues such as persistent moisture or poor ventilation. Professionals can identify the root cause and prevent future growth through targeted solutions.
  3. Mold inside heating, ventilation, or air conditioning systems poses significant challenges. Air circulation can distribute mold spores throughout your home, exacerbating health risks. Handling HVAC-related mold requires specialized equipment and expertise.
  4. Some molds, like Stachybotrys chartarum (commonly known as black mold), produce mycotoxins that are harmful to health over prolonged exposure. Identifying toxic molds accurately often requires professional lab testing.
  5. If anyone in the household experiences persistent respiratory issues, allergies, headaches, or other symptoms associated with mold exposure—especially children, elderly individuals, or those with compromised immune systems—it’s important to seek professional help promptly.
  6. Homes affected by floods, burst pipes, or roof leaks are at high risk for hidden mold growth behind walls or under floors. A licensed remediation expert can assess the extent of water damage and implement effective removal strategies.

Benefits of Hiring Professional Mold Removal Services

  • Accurate Assessment:Experts perform thorough inspections using tools like moisture meters and infrared cameras to locate hidden mold.
  • Effective Containment:They follow strict containment procedures (e. g. , sealing off affected areas) to prevent cross-contamination.
  • Specialized Equipment:Professionals use industrial-grade HEPA vacuums, air scrubbers, and antimicrobial treatments for efficient cleanup.
  • Comprehensive Remediation:Properly trained technicians address not only visible mold but also structural elements like drywall or insulation that may need replacement.
  • Health Protection Measures:Certified specialists wear protective gear such as respirators and provide safe disposal of contaminated materials.
  • Prevention Guidance:Many companies offer advice on correcting humidity levels or improving ventilation to minimize future risks.
Service Feature DIY Approach Professional Services
Scope of Work Limited Extensive
Equipment Quality Basic household tools Industrial-grade machinery
Risk of Recurrence Moderate-to-high Low
Time Efficiency Longer due to lack of expertise Faster

Choosing the Right Professional Service

  1. Verify certifications such as IICRC (Institute of Inspection Cleaning and Restoration Certification) accreditation.
  2. Request references or reviews from previous clients.
  3. Confirm they follow industry guidelines like those outlined by OSHA and the EPA.
  4. Ensure they provide a clear scope of work before starting any project.

By knowing when it’s appropriate to hire professionals and understanding what they bring to the table, you can ensure that your home remains safe from mold-related dangers while avoiding unnecessary complications in the long term.


Effective Tips for Mold Removal Vero Beach: Say Goodbye to Stains on Textiles and Fabrics

view through a magnifying glass white wall with black mold. view through a magnifying glass. white wall with black mold. dangerous fungus that needs to be destroyed. It spoils look of house and is very harmful parasite for human health. mold removal stock pictures, royalty-free photos & images

Mold and mildew stains on textiles and fabrics can be both unsightly and harmful, as they may lead to unpleasant odors, health issues, or even permanent damage to the material if not addressed correctly. Here is a comprehensive guide to removing mold and mildew stains from textiles effectively, ensuring your fabrics are clean, safe, and odor-free.

Identifying Mold-Infested Fabrics

Before beginning the cleaning process, inspect the textile or fabric for signs of mold. Common indicators include:
– Black, green, or white spots or discoloration.
– A musty or damp odor.
– Persistent staining even after washing with mild detergent.

Step-by-Step Instructions for Mold Removal

  1. Take the affected fabric outdoors before treating it, if possible. This prevents mold spores from spreading inside your home.
  2. Wear protective gloves and a mask to avoid inhaling mold spores or coming into contact with allergens.
  3. Gently shake or brush off any visible mold growth while outside to remove loose spores. Use a soft-bristle brush for delicate surfaces like wool or silk.
  4. Create a solution using 1 cup of white vinegar per gallon of water in a large bucket or tub.
  5. Submerge the fabric completely in this solution for at least 1 hour. Vinegar is known for its natural anti-fungal properties that help kill mold while being gentle on fabrics.
  6. After soaking, wash the fabric in a washing machine using hot water (if safe for the material) along with ½ cup of baking soda added to your regular detergent.
  7. Baking soda works as a deodorizer and helps eliminate remaining odors caused by mildew.
  8. Hang the fabric outdoors under direct sunlight since UV rays have natural antibacterial properties that further inhibit mold growth.
  9. Ensure complete drying as residual moisture can lead to recurring mold problems.

For Stubborn Stains

If the stain persists after washing:
– Combine 2 parts hydrogen peroxide with 1 part water in a spray bottle (test this mixture on an inconspicuous area first). Spray directly onto the stain and let it sit for 15–20 minutes before rinsing thoroughly. – Avoid harsh chemical bleach unless absolutely necessary since it may weaken fibers or cause discoloration.

Special Care Tips Based on Fabric Types

Fabric Type Treatment Notes
Cotton Safe for vinegar soaking; can tolerate hot water washes
Wool Use cold water wash only; avoid excessive sunlight exposure
Silk Test cleaning solutions carefully; mild detergents are recommended
Synthetic Blends Can often withstand both vinegar soaks and warm machine washes

Preventing Future Mold Issues

To prevent future occurrences of mold on your textiles:
– Store fabrics in dry areas with good ventilation. – Use silica gel packs or dehumidifiers in closets prone to dampness. – Avoid leaving wet clothes sitting in hampers or washing machines for extended periods. – Regularly inspect stored textiles during humid seasons for early signs of potential growth.

By following these steps diligently, you can address both minor and severe cases of mold on textiles while preserving their quality over time.

Step-by-Step Mold Remediation Vero Beach Guide for Upholstered Furniture

Mold can often develop on upholstered furniture due to high humidity, poor ventilation, or water damage. Properly removing mold from furniture is essential to preserve the material and prevent health risks. Here is a detailed, step-by-step guide tailored to different types of upholstery materials.

Step 1: Mold Inspection Vero Beach – Assess the Situation and Gather Supplies

  • Vacuum cleaner with a HEPA filter
  • Soft-bristle brush or microfiber cloth
  • White vinegar or rubbing alcohol
  • Mild detergent
  • Baking soda (optional)
  • Spray bottle
  • Clean water
  • Protective gear (gloves, mask, goggles)

Step 2: Prepare the Furniture for Water Damage Restoration Vero Beach FL Cleaning

  1. Move the Furniture
    Take the affected furniture outdoors if possible to prevent spreading spores indoors.
  2. Vacuum Thoroughly
    Use a vacuum with a HEPA filter to remove loose mold spores from the surface. Pay close attention to seams and crevices.
  3. Test in an Inconspicuous Area
    Before applying any cleaning solution, test it on a hidden part of the upholstery to ensure it won’t cause discoloration or damage.

For Fabric Upholstery:

  1. Mix equal parts white vinegar and water in a spray bottle.
  2. Lightly mist the affected area without soaking it.
  3. Scrub Gently
    Use a soft-bristle brush or microfiber cloth to work on the mold stains in circular motions.
  4. Rinse and Dry
    Dampen another clean cloth with plain water and blot away any remaining residue before allowing it to air dry completely.

For Leather Upholstery:

  1. Mix one part rubbing alcohol with four parts water.
  2. Dampen a soft cloth and gently wipe down all affected areas.
  3. Condition After Cleaning
    Once dry, apply a leather conditioner to restore moisture and prevent cracking.

For Synthetic Upholstery:

  1. Prepare soapy water using mild detergent.
  2. Dip a clean sponge into this mixture and blot over moldy areas.
  3. Rinse Gently
    Wipe off soap residue with another damp cloth without soaking the fabric excessively.

Step 3: Vero Beach Mold Remediation to Eliminate Odors

Sprinkle baking soda over the cleaned surface to absorb musty odors caused by mold growth. Let it sit for several hours before vacuuming thoroughly again.

Step 4: Prevent Future Mold Growth with Mold Remediation Vero Beach FL

To keep your upholstered furniture free of mold in the future: – Maintain proper indoor humidity levels (30–50%). – Keep furniture away from damp walls or windows. – Use dehumidifiers or air conditioners in high-humidity areas. – Regularly clean upholstered surfaces even if no visible mold is present.

Material Type Recommended Cleaner Additional Tips
Fabric Vinegar-Water Solution Avoid over-wetting; blot dry
Leather Rubbing Alcohol Solution Condition leather post-cleaning
Synthetic Mild Detergent Solution Test first for color-fastness

By following these steps carefully based on your specific upholstery material, you can effectively remove mold while preserving your furniture’s integrity and appearance. Always prioritize safety by wearing protective gear during this process.

Step-by-Step Guide to Mold Removal Vero Beach FL: Tackle Upholstered Furniture with Ease

Mold on upholstered furniture not only creates unsightly stains but can also pose health risks if left untreated. Addressing mold growth on furniture requires careful handling to avoid damage to the fabric or material while ensuring thorough removal. Below is a step-by-step guide tailored to different types of upholstery materials.

Step 1: Gather Necessary Supplies

Before starting, prepare the tools and cleaning agents needed for the process.

Basic Supplies:
– Rubber gloves and a mask (for safety)
– A soft-bristled brush or vacuum with a HEPA filter
– White vinegar or rubbing alcohol (for natural cleaning)
– Mild detergent or specialized upholstery cleaner
– Clean microfiber cloths and a bucket of warm water
– Baking soda (optional, for odor control)

Step 2: Identify the Upholstery Material

Material Type Characteristics Cleaning Precautions
Fabric Soft, porous Avoid over-saturating; test cleaner in an inconspicuous area
Leather Smooth surface, non-porous Use leather-safe cleaners to prevent drying or cracking
Microfiber Synthetic with tight weave Use minimal moisture; blot gently

Check your furniture’s care tags for cleaning codes before proceeding.

Step 3: Remove Loose Mold Particles

For all materials: 1. Take the furniture outdoors if possible (to prevent spreading spores indoors). 2. Use a vacuum with a HEPA filter to carefully remove loose mold spores from the surface. 3. Alternatively, gently brush off visible mold using a soft-bristled brush.

Dispose of vacuum bags or clean your equipment thoroughly after use.

Step 4: Clean Based on Material Type

For Fabric Upholstery:
1. Mix equal parts white vinegar and warm water in a spray bottle.
2. Lightly mist the affected area without soaking it.
3. Let it sit for 10–15 minutes, then blot gently with a clean cloth soaked in warm water. 4. Allow to air dry completely outdoors or in a well-ventilated space.

For Leather Upholstery:
1. Dampen a cloth with rubbing alcohol diluted with water (50:50 ratio).
2. Wipe down the affected area gently. 3. Follow up by applying leather conditioner to restore moisture and prevent cracking.

For Microfiber Upholstery:
1. Sprinkle baking soda over the affected area and allow it to sit for several hours to absorb moisture and odor. 2. Vacuum thoroughly before treating stains with an upholstery-specific cleaner. 3. Blot dry carefully using minimal liquid.

Electronic hygrometer for taking measurements. Accessories for determining the moisture content of building materials. Light background. Electronic hygrometer for taking measurements. Accessories for determining the moisture content of building materials. Light background. mold removal stock pictures, royalty-free photos & images

Step 5: Prevent Future Mold Growth

Once cleaned, take steps to prevent mold from returning: – Keep humidity levels below 50% indoors using dehumidifiers. – Avoid placing furniture in damp areas like basements without proper ventilation. – For long-term storage, cover upholstered items with breathable fabric covers instead of plastic wraps.

By following this methodical approach customized for different materials, you can effectively remove mold from upholstered furniture while protecting its integrity and prolonging its lifespan.

Expert Mold Specialist Vero Beach: Safely Removing Mold from Hard Surface Floors

Mold growth on hard surface floors can be both unsightly and harmful to indoor air quality. It is crucial to address the issue promptly to prevent further damage and health risks. Below, you’ll find safe and effective methods for removing mold from hard flooring surfaces like tile, concrete, and wood.

Understanding the Challenges of Mold on Hard Floors

Mold can grow on virtually any surface where moisture is present. Hard surface floors are particularly susceptible when exposed to water spills, high humidity, or flooding. Each type of flooring—tile, concrete, or wood—requires a specific approach to effectively remove mold without causing damage.

Tools and Supplies You Will Need

  • Protective gear: gloves, goggles, and an N95 mask
  • A stiff-bristled brush or scrub pad
  • Mild detergent or dish soap
  • White distilled vinegar or a hydrogen peroxide solution (3%)
  • Baking soda (optional for added scrubbing power)
  • A bucket of warm water
  • Microfiber cloths or mops
  • HEPA vacuum cleaner (optional for cleanup)

For severe cases of mold infestation, professional-grade cleaning agents may be necessary.

Removing Mold from Tile Floors

  1. Ventilate the Area: Open windows and doors to ensure proper airflow while cleaning. Use fans if available.
  2. Prepare the Cleaning Solution: Mix equal parts white vinegar and water in a spray bottle or bucket.
  3. Scrub Effectively: Spray the affected areas with the solution and scrub with a stiff-bristled brush until mold stains are removed.
  4. Rinse Thoroughly: Use clean water to rinse off any residue.
  5. Dry Completely: Wipe down with a microfiber cloth or allow natural drying using ventilation.

Pro Tip: For grout lines between tiles that show stubborn mold growth, use baking soda paste (baking soda mixed with a small amount of water) as an abrasive cleaner.

Cleaning Mold from Concrete Floors

  1. Apply Cleaning Solution: Spray undiluted hydrogen peroxide directly onto the affected area for deep penetration into pores.
  2. Allow Time to Sit: Wait 10–15 minutes so that the hydrogen peroxide can kill spores effectively.
  3. Scrub Vigorously: Use a stiff brush to work away visible mold debris.
  4. Rinse Off Residue: Mop up any residue using warm water.
  5. Seal the Surface if Needed: Once clean and dry, consider applying a concrete sealer to prevent future mold growth.

Note: Avoid using bleach as it might not penetrate deeply enough into porous surfaces like concrete.

Safely Removing Mold from Wooden Floors

  1. Test in an Inconspicuous Spot: Ensure your chosen cleaning agent won’t damage wood finishes or cause discoloration.
  2. Use Gentle Cleaners First: Mix mild dish soap with warm water for light cleaning needs.
  3. Apply Vinegar Solution for Persistent Growth: For deeper issues, use diluted vinegar (one part vinegar to three parts water).
  4. Work Gently but Thoroughly: Scrub lightly along wood grains using a soft brush or cloth.
  5. Dry Immediately After Cleaning: Excess moisture can warp wood; use towels or fans as needed.

For hardwoods with severe infestations requiring sanding or refinishing post-cleaning, consult professionals.

Maintenance Tips for Preventing Future Mold Issues on Floors

  • Regularly mop floors with mild cleaners that have antifungal properties like vinegar solutions.
  • Use dehumidifiers in rooms prone to high humidity levels (e.g., basements).
  • Repair leaks immediately around plumbing fixtures nearby hard-surface floors.
  • Maintain good ventilation by opening windows when weather permits or running exhaust fans in spaces like bathrooms.
Flooring Type Cleaning Agent Recommendation Key Tip
Tile Vinegar-water mix Focus on grout lines
Concrete Hydrogen peroxide solution Add sealant post-cleaning
Wood Mild soap/vinegar dilution Avoid excess scrubbing/moisture

By addressing hard surface floor mold safely and consistently maintaining clean conditions indoors moving forward will help avoid complications caused by unchecked growth risks over time naturally

The Best Methods for Removing Mold from Exterior Surfaces Like Decks, Patios, and Foundations

Mold on exterior surfaces can not only cause structural damage over time but also create unsightly appearances and health risks. Proper removal of mold from areas like decks, patios, and foundations requires a combination of safe cleaning techniques and preventive measures. Below is a detailed guide to help you restore these surfaces effectively.

Step 1: Inspect the Affected Area

Before beginning the removal process, assess the extent of mold growth. This step allows you to determine whether professional assistance is required or if the issue can be managed safely using DIY methods.

  • Light Mold Growth: Small patches or minor discoloration that hasn’t penetrated deeply into porous materials.
  • Moderate Mold Growth: Spreading colonies across larger areas with possible staining.
  • Severe Mold Growth: Significant coverage with deep penetration into materials like wood or concrete; may require professional intervention.

Step 2: Gather Necessary Tools and Materials

  • Protective gear: Gloves, safety goggles, and an N95 mask or respirator.
  • Cleaning solutions (store-bought fungicides or homemade options such as diluted bleach or white vinegar).
  • A soft-bristle brush for scrubbing.
  • A power washer (optional) for outdoor use.
  • Absorbent cloths or rags for wiping surfaces.
  • A hose with clean water supply.
Tools Needed Purpose
Protective Gear Safeguards health during cleaning.
Cleaning Solutions Kills mold spores effectively.
Scrubbing Brush Removes embedded mold in surfaces.
Power Washer Quickly cleans large outdoor areas.

Step 3: Choose the Right Cleaning Solution

  1. Use a solution made of one cup of white vinegar mixed with one gallon of water to kill mildew without damaging wood grain.
  2. For tougher stains, mix three parts water with one part household bleach.
  3. Clean using a mixture of half a cup of liquid detergent powder in a gallon of warm water.
  4. For stubborn stains, add one cup of trisodium phosphate (TSP) to this solution for enhanced efficacy.
  5. Opt for manufacturer-recommended cleaners specifically designed for composite materials to avoid causing discoloration.

Step 4: Apply Cleaning Solution and Scrub Thoroughly

  1. Wet the surface first using clean water to reduce dust and prevent excessive absorption by porous materials like wood or concrete.
  2. Apply your chosen cleaning solution generously over affected areas using an absorbent cloth or sprayer.
  3. Allow it to sit for about 10–15 minutes to loosen stubborn mold deposits before scrubbing.
  4. Gently scrub any visible colonies with a soft-bristle brush in circular motions until all traces are removed.

Pro Tip: Avoid using metal brushes on wooden surfaces as they may leave scratches that allow future mold growth.

Step 5: Rinse Thoroughly Using Clean Water

  • A garden hose for small spaces like decks or stairs.
  • A power washer at low pressure settings (especially effective on patios).

Rinsing ensures no residue remains that could encourage regrowth.

Step 6: Dry Properly After Cleaning

  • Use absorbent towels where possible.
  • Allow direct sunlight exposure when weather permits—it acts as a natural disinfectant while drying out damp structures more quickly.

Preventive Measures Against Future Growth

  1. Regularly clean outdoor areas every few months—even in absence of visible signs—to remove dirt that attracts moisture buildup.
  2. Ensure proper drainage around foundations by fixing leaks & directing runoff away from walls/patios/decks toward drains instead. 3 . Seal porous materials annually w/ waterproof coatings prevent further spore penetration

How to Address Mold Growth on Roofs: Tips for Different Materials like Asphalt and Slate

Mold growth on roofs is not only unsightly but can also compromise the structural integrity of your home. Addressing this issue requires a targeted approach based on the roofing material, as each surface has unique vulnerabilities and cleaning requirements. Below, we outline effective strategies for removing mold from common roof types like asphalt shingles and slate.

Understanding the Risks of Mold on Roofs

Mold and algae growth can lead to several problems, including:
Roof Damage: Mold retains moisture, which can deteriorate roofing materials over time.
Structural Concerns: Prolonged mold exposure may weaken roof supports, leading to costly repairs.
Health Hazards: Spores released by mold may affect indoor air quality, potentially causing respiratory issues for inhabitants.

Addressing mold early is crucial to preventing further damage.

General Safety Tips Before You Start

Before tackling mold removal on your roof, keep the following safety tips in mind:
Wear Protective Gear: Always use gloves, goggles, and an N95 mask to avoid direct contact with spores or inhaling them.
Use Non-Slip Shoes: Roof surfaces can become slippery when wet or during cleaning procedures. Ensure proper footing to prevent accidents.
Check Weather Conditions: Opt for a dry day with no strong winds to ensure safety while working at height.

Black mold buildup in the corner of an old house. development of mildew under the Wallpaper Close-up Of A Shocked Woman Looking At Mold On Wall mold removal stock pictures, royalty-free photos & images

Cleaning Mold from Asphalt Shingles

  1. Mix a 50/50 solution of water and household bleach (sodium hypochlorite). Add a small amount of dish soap if needed.
  2. Use a garden sprayer or handheld pump sprayer and apply the solution generously over the affected areas.
  3. Let the solution sit for 15–20 minutes but avoid letting it dry completely.
  4. Use a low-pressure hose (not a power washer) to rinse off the solution and dead mold effectively.

Pro Tip: Avoid using abrasive brushes or high-pressure washers as they can dislodge asphalt granules.

Removing Mold from Slate Roofs

  1. Use oxygen bleach instead of chlorine bleach to prevent discoloration or damage.
  2. Apply the cleaner with a soft-bristle brush or mop designed for roofing applications.
  3. Carefully rinse using a hose or low-pressure washer set at safe levels (below 500 PSI).

Note: Do not walk directly on slate tiles as they are prone to cracking under weight.

Preventing Future Mold Growth

Preventative Measures Benefits
Install Zinc/Copper Strips Inhibits fungal growth when water flows over strips onto shingles/slates
Trim Overhanging Branches Reduces shaded areas where moisture lingers
Clean Gutters Regularly Prevents water pooling near roof edges
Ensure Proper Ventilation Reduces excess moisture buildup indoors that can seep into roofing layers

By tailoring your approach based on material type and observing preventative measures, you can effectively manage mold growth on your roof while preserving its longevity and appearance.

Expert Tips from Mold Remediation Professionals Vero Beach FL for Removing Mold from Mattresses Safely

Mold growth on mattresses is not only unpleasant but can also pose health risks such as allergies, respiratory issues, and skin irritation. Tackling mold effectively requires the right approach to ensure the mattress is safely cleaned without compromising its integrity. Below is a comprehensive guide, broken down into manageable steps, to help remove mold from your mattress using safe and reliable techniques.

Step 1: Gather Necessary Tools and Supplies

  • Protective Gear: Gloves, mask, and safety goggles to avoid direct contact with mold spores.
  • Vacuum Cleaner: Preferably one with a HEPA filter to trap mold particles.
  • White Vinegar: A natural antifungal agent.
  • Hydrogen Peroxide (3%): For deeper cleaning and disinfecting.
  • Baking Soda: To absorb moisture and neutralize odors.
  • Soft-Bristled Brush: For scrubbing without damaging mattress fabric.
  • Spray Bottles: For applying cleaning solutions evenly.
  • Clean Towels or Cloths: Used for blotting excess moisture.

Step 2: Prepare the Mattress for Cleaning

  1. Move the mattress outdoors if possible. Sunlight helps kill mold spores while providing proper ventilation.
  2. If moving outside isn’t feasible, ensure good indoor ventilation by opening windows or turning on fans.

Step 3: Vacuum Mold Spores

Using a vacuum cleaner with a HEPA filter: – Thoroughly vacuum both sides of the mattress to remove loose mold spores. – Pay special attention to seams, crevices, and edges where mold tends to accumulate.

Dispose of the vacuum bag or clean the filter immediately after use to prevent spreading spores.

Step 4: Apply a Cleaning Solution

Solution Preparation Application
White Vinegar Mix equal parts vinegar and water in a spray bottle. Lightly spray infected areas; let sit for 30–60 minutes before scrubbing.
Hydrogen Peroxide (3%) Use hydrogen peroxide directly or dilute with equal parts water. Spray onto affected areas; let sit for 15 minutes before wiping clean.

Avoid over-saturating the mattress as excessive moisture can worsen mold growth.

Step 5: Gently Scrub Mold Stains

Using a soft-bristled brush: 1. Scrub gently in circular motions until visible stains fade away. 2. Wipe off residues using a clean cloth dampened with water.

Repeat this process if stains persist.

Step 6: Dry Thoroughly

Proper drying is crucial to prevent future mold growth: – Place the mattress outdoors in direct sunlight or near an open window for airflow. – Use fans or dehumidifiers indoors to speed up drying time if sunlight isn’t accessible.

Sprinkle baking soda over damp areas once dry-to-the-touch; leave it for several hours before vacuuming it off to eliminate any residual odor.

Preventative Tips for Future Mold Growth on Mattresses

  1. Use a waterproof mattress protector to shield against spills and humidity infiltration.
  2. Ensure adequate bedroom ventilation by frequently airing out the room or employing dehumidifiers when needed.
  3. Keep relative indoor humidity levels below 50% using a hygrometer for monitoring.
  4. Regularly clean your bedding materials such as sheets, covers, and pillows in hot water where possible.

By following these safe techniques and preventive measures diligently, you can maintain both cleanliness and longevity for your mattress while safeguarding your health from potential complications related to mold exposure.

A Complete Guide to Removing Mold from Mattresses with Safe and Reliable Techniques

Mold on a mattress not only damages the material but also poses significant health risks, such as respiratory issues and allergies. Addressing this issue promptly and safely is essential. Below is a comprehensive guide to removing mold from mattresses using proven techniques that prioritize safety and effectiveness.

Step 1: Gather Necessary Tools and Materials

  • Vacuum cleaner with a HEPA filter
  • Mild detergent or specialized upholstery cleaner
  • White vinegar or hydrogen peroxide
  • Baking soda
  • Clean cloths or sponges
  • Spray bottle
  • Protective gloves, mask, and goggles (to protect against spores)

Step 2: Safety Precautions Before Cleaning

  1. Work in a well-ventilated area – If possible, move the mattress outdoors to minimize spreading mold spores indoors.
  2. Wear protective gear – Use gloves, a mask, and goggles to reduce your risk of exposure.
  3. Inspect the mattress thoroughly – Identify areas with visible mold growth and note any musty odors that may indicate hidden mold.

Step 3: Clean Surface Mold Using a Vacuum Cleaner

Use a vacuum cleaner equipped with a HEPA filter to remove loose mold spores from the surface of the mattress. Run the vacuum over all sides of the mattress, paying close attention to seams where spores may collect. Dispose of the vacuum bag immediately after use in an outdoor trash bin.

Step 4: Drying Your Mattress Thoroughly

  • Place it in direct sunlight if weather permits; sunlight helps kill remaining spores.
  • Use fans or dehumidifiers indoors if drying outside is not an option.
  • Avoid making up your bed until you’re certain there’s no residual moisture.

Option 1: White Vinegar Solution

  1. Mix equal parts white vinegar and water in a spray bottle.
  2. Lightly spray the affected areas without soaking the mattress.
  3. Let it sit for 30 minutes before blotting with a clean cloth.

Option 2: Hydrogen Peroxide Solution

  1. Combine one part hydrogen peroxide with two parts water.
  2. Apply using a cloth or sponge, gently dabbing the stained areas.
  3. Allow it to sit for 15–20 minutes before wiping clean.

Option 3: Baking Soda Treatment (For Odor Control)

  1. Sprinkle baking soda generously over dampened areas treated with vinegar or peroxide.
  2. Let it sit for several hours or overnight if possible.
  3. Vacuum thoroughly after it has dried.
Solution Type Ideal For Precaution
White Vinegar General mold removal Avoid over-saturation
Hydrogen Peroxide Tough stains Test on small area first for discoloration
Baking Soda Odor neutralization Can be combined with other treatments

Preventing Future Mold Growth

  • Use a waterproof mattress protector to create an extra barrier against moisture.
  • Keep humidity levels below 50% in your bedroom using dehumidifiers when necessary.
  • Ensure proper ventilation by opening windows regularly or using exhaust fans.
  • Rotate or flip your mattress periodically so that no single side remains damp for extended periods.

By employing these safe and reliable techniques, you can effectively restore your mattress while reducing health risks associated with mold exposure—ensuring you sleep on a clean and healthy surface again soon.