
Mold and mildew stains on textiles and fabrics can be both unsightly and harmful, as they may lead to unpleasant odors, health issues, or even permanent damage to the material if not addressed correctly. Here is a comprehensive guide to removing mold and mildew stains from textiles effectively, ensuring your fabrics are clean, safe, and odor-free.
Identifying Mold-Infested Fabrics
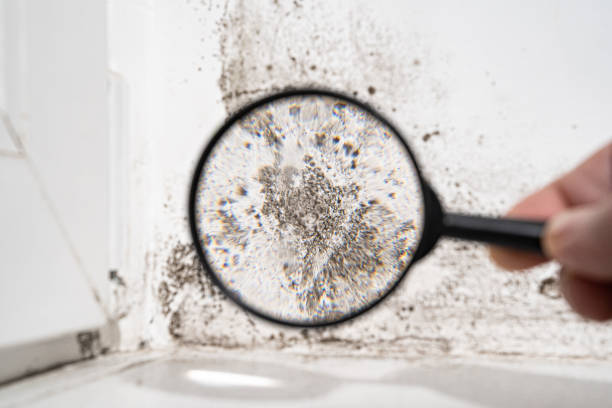
Before beginning the cleaning process, inspect the textile or fabric for signs of mold. Common indicators include:
– Black, green, or white spots or discoloration.
– A musty or damp odor.
– Persistent staining even after washing with mild detergent.
Step-by-Step Instructions for Mold Removal
- Take the affected fabric outdoors before treating it, if possible. This prevents mold spores from spreading inside your home.
- Wear protective gloves and a mask to avoid inhaling mold spores or coming into contact with allergens.
- Gently shake or brush off any visible mold growth while outside to remove loose spores. Use a soft-bristle brush for delicate surfaces like wool or silk.
- Create a solution using 1 cup of white vinegar per gallon of water in a large bucket or tub.
- Submerge the fabric completely in this solution for at least 1 hour. Vinegar is known for its natural anti-fungal properties that help kill mold while being gentle on fabrics.
- After soaking, wash the fabric in a washing machine using hot water (if safe for the material) along with ½ cup of baking soda added to your regular detergent.
- Baking soda works as a deodorizer and helps eliminate remaining odors caused by mildew.
- Hang the fabric outdoors under direct sunlight since UV rays have natural antibacterial properties that further inhibit mold growth.
- Ensure complete drying as residual moisture can lead to recurring mold problems.
For Stubborn Stains
If the stain persists after washing:
– Combine 2 parts hydrogen peroxide with 1 part water in a spray bottle (test this mixture on an inconspicuous area first). Spray directly onto the stain and let it sit for 15–20 minutes before rinsing thoroughly. – Avoid harsh chemical bleach unless absolutely necessary since it may weaken fibers or cause discoloration.
Special Care Tips Based on Fabric Types
| Fabric Type | Treatment Notes |
| Cotton | Safe for vinegar soaking; can tolerate hot water washes |
| Wool | Use cold water wash only; avoid excessive sunlight exposure |
| Silk | Test cleaning solutions carefully; mild detergents are recommended |
| Synthetic Blends | Can often withstand both vinegar soaks and warm machine washes |
Preventing Future Mold Issues
To prevent future occurrences of mold on your textiles:
– Store fabrics in dry areas with good ventilation. – Use silica gel packs or dehumidifiers in closets prone to dampness. – Avoid leaving wet clothes sitting in hampers or washing machines for extended periods. – Regularly inspect stored textiles during humid seasons for early signs of potential growth.
By following these steps diligently, you can address both minor and severe cases of mold on textiles while preserving their quality over time.
Step-by-Step Mold Remediation Vero Beach Guide for Upholstered Furniture
Mold can often develop on upholstered furniture due to high humidity, poor ventilation, or water damage. Properly removing mold from furniture is essential to preserve the material and prevent health risks. Here is a detailed, step-by-step guide tailored to different types of upholstery materials.
Step 1: Mold Inspection Vero Beach – Assess the Situation and Gather Supplies
- Vacuum cleaner with a HEPA filter
- Soft-bristle brush or microfiber cloth
- White vinegar or rubbing alcohol
- Mild detergent
- Baking soda (optional)
- Spray bottle
- Clean water
- Protective gear (gloves, mask, goggles)
Step 2: Prepare the Furniture for Water Damage Restoration Vero Beach FL Cleaning
- Move the Furniture
Take the affected furniture outdoors if possible to prevent spreading spores indoors. - Vacuum Thoroughly
Use a vacuum with a HEPA filter to remove loose mold spores from the surface. Pay close attention to seams and crevices. - Test in an Inconspicuous Area
Before applying any cleaning solution, test it on a hidden part of the upholstery to ensure it won’t cause discoloration or damage.
For Fabric Upholstery:
- Mix equal parts white vinegar and water in a spray bottle.
- Lightly mist the affected area without soaking it.
- Scrub Gently
Use a soft-bristle brush or microfiber cloth to work on the mold stains in circular motions. - Rinse and Dry
Dampen another clean cloth with plain water and blot away any remaining residue before allowing it to air dry completely.
For Leather Upholstery:
- Mix one part rubbing alcohol with four parts water.
- Dampen a soft cloth and gently wipe down all affected areas.
- Condition After Cleaning
Once dry, apply a leather conditioner to restore moisture and prevent cracking.
For Synthetic Upholstery:
- Prepare soapy water using mild detergent.
- Dip a clean sponge into this mixture and blot over moldy areas.
- Rinse Gently
Wipe off soap residue with another damp cloth without soaking the fabric excessively.
Step 3: Vero Beach Mold Remediation to Eliminate Odors
Sprinkle baking soda over the cleaned surface to absorb musty odors caused by mold growth. Let it sit for several hours before vacuuming thoroughly again.
Step 4: Prevent Future Mold Growth with Mold Remediation Vero Beach FL
To keep your upholstered furniture free of mold in the future: – Maintain proper indoor humidity levels (30–50%). – Keep furniture away from damp walls or windows. – Use dehumidifiers or air conditioners in high-humidity areas. – Regularly clean upholstered surfaces even if no visible mold is present.
| Material Type | Recommended Cleaner | Additional Tips |
| Fabric | Vinegar-Water Solution | Avoid over-wetting; blot dry |
| Leather | Rubbing Alcohol Solution | Condition leather post-cleaning |
| Synthetic | Mild Detergent Solution | Test first for color-fastness |
By following these steps carefully based on your specific upholstery material, you can effectively remove mold while preserving your furniture’s integrity and appearance. Always prioritize safety by wearing protective gear during this process.
Step-by-Step Guide to Mold Removal Vero Beach FL: Tackle Upholstered Furniture with Ease
Mold on upholstered furniture not only creates unsightly stains but can also pose health risks if left untreated. Addressing mold growth on furniture requires careful handling to avoid damage to the fabric or material while ensuring thorough removal. Below is a step-by-step guide tailored to different types of upholstery materials.
Step 1: Gather Necessary Supplies
Before starting, prepare the tools and cleaning agents needed for the process.
Basic Supplies:
– Rubber gloves and a mask (for safety)
– A soft-bristled brush or vacuum with a HEPA filter
– White vinegar or rubbing alcohol (for natural cleaning)
– Mild detergent or specialized upholstery cleaner
– Clean microfiber cloths and a bucket of warm water
– Baking soda (optional, for odor control)
Step 2: Identify the Upholstery Material
| Material Type | Characteristics | Cleaning Precautions |
| Fabric | Soft, porous | Avoid over-saturating; test cleaner in an inconspicuous area |
| Leather | Smooth surface, non-porous | Use leather-safe cleaners to prevent drying or cracking |
| Microfiber | Synthetic with tight weave | Use minimal moisture; blot gently |
Check your furniture’s care tags for cleaning codes before proceeding.
Step 3: Remove Loose Mold Particles
For all materials: 1. Take the furniture outdoors if possible (to prevent spreading spores indoors). 2. Use a vacuum with a HEPA filter to carefully remove loose mold spores from the surface. 3. Alternatively, gently brush off visible mold using a soft-bristled brush.
Dispose of vacuum bags or clean your equipment thoroughly after use.
Step 4: Clean Based on Material Type
For Fabric Upholstery:
1. Mix equal parts white vinegar and warm water in a spray bottle.
2. Lightly mist the affected area without soaking it.
3. Let it sit for 10–15 minutes, then blot gently with a clean cloth soaked in warm water. 4. Allow to air dry completely outdoors or in a well-ventilated space.
For Leather Upholstery:
1. Dampen a cloth with rubbing alcohol diluted with water (50:50 ratio).
2. Wipe down the affected area gently. 3. Follow up by applying leather conditioner to restore moisture and prevent cracking.
For Microfiber Upholstery:
1. Sprinkle baking soda over the affected area and allow it to sit for several hours to absorb moisture and odor. 2. Vacuum thoroughly before treating stains with an upholstery-specific cleaner. 3. Blot dry carefully using minimal liquid.
Step 5: Prevent Future Mold Growth
Once cleaned, take steps to prevent mold from returning: – Keep humidity levels below 50% indoors using dehumidifiers. – Avoid placing furniture in damp areas like basements without proper ventilation. – For long-term storage, cover upholstered items with breathable fabric covers instead of plastic wraps.
By following this methodical approach customized for different materials, you can effectively remove mold from upholstered furniture while protecting its integrity and prolonging its lifespan.
Expert Mold Specialist Vero Beach: Safely Removing Mold from Hard Surface Floors
Mold growth on hard surface floors can be both unsightly and harmful to indoor air quality. It is crucial to address the issue promptly to prevent further damage and health risks. Below, you’ll find safe and effective methods for removing mold from hard flooring surfaces like tile, concrete, and wood.
Understanding the Challenges of Mold on Hard Floors
Mold can grow on virtually any surface where moisture is present. Hard surface floors are particularly susceptible when exposed to water spills, high humidity, or flooding. Each type of flooring—tile, concrete, or wood—requires a specific approach to effectively remove mold without causing damage.
Tools and Supplies You Will Need
- Protective gear: gloves, goggles, and an N95 mask
- A stiff-bristled brush or scrub pad
- Mild detergent or dish soap
- White distilled vinegar or a hydrogen peroxide solution (3%)
- Baking soda (optional for added scrubbing power)
- A bucket of warm water
- Microfiber cloths or mops
- HEPA vacuum cleaner (optional for cleanup)
For severe cases of mold infestation, professional-grade cleaning agents may be necessary.
Removing Mold from Tile Floors
- Ventilate the Area: Open windows and doors to ensure proper airflow while cleaning. Use fans if available.
- Prepare the Cleaning Solution: Mix equal parts white vinegar and water in a spray bottle or bucket.
- Scrub Effectively: Spray the affected areas with the solution and scrub with a stiff-bristled brush until mold stains are removed.
- Rinse Thoroughly: Use clean water to rinse off any residue.
- Dry Completely: Wipe down with a microfiber cloth or allow natural drying using ventilation.
Pro Tip: For grout lines between tiles that show stubborn mold growth, use baking soda paste (baking soda mixed with a small amount of water) as an abrasive cleaner.
Cleaning Mold from Concrete Floors
- Apply Cleaning Solution: Spray undiluted hydrogen peroxide directly onto the affected area for deep penetration into pores.
- Allow Time to Sit: Wait 10–15 minutes so that the hydrogen peroxide can kill spores effectively.
- Scrub Vigorously: Use a stiff brush to work away visible mold debris.
- Rinse Off Residue: Mop up any residue using warm water.
- Seal the Surface if Needed: Once clean and dry, consider applying a concrete sealer to prevent future mold growth.
Note: Avoid using bleach as it might not penetrate deeply enough into porous surfaces like concrete.
Safely Removing Mold from Wooden Floors
- Test in an Inconspicuous Spot: Ensure your chosen cleaning agent won’t damage wood finishes or cause discoloration.
- Use Gentle Cleaners First: Mix mild dish soap with warm water for light cleaning needs.
- Apply Vinegar Solution for Persistent Growth: For deeper issues, use diluted vinegar (one part vinegar to three parts water).
- Work Gently but Thoroughly: Scrub lightly along wood grains using a soft brush or cloth.
- Dry Immediately After Cleaning: Excess moisture can warp wood; use towels or fans as needed.
For hardwoods with severe infestations requiring sanding or refinishing post-cleaning, consult professionals.
Maintenance Tips for Preventing Future Mold Issues on Floors
- Regularly mop floors with mild cleaners that have antifungal properties like vinegar solutions.
- Use dehumidifiers in rooms prone to high humidity levels (e.g., basements).
- Repair leaks immediately around plumbing fixtures nearby hard-surface floors.
- Maintain good ventilation by opening windows when weather permits or running exhaust fans in spaces like bathrooms.
| Flooring Type | Cleaning Agent Recommendation | Key Tip |
| Tile | Vinegar-water mix | Focus on grout lines |
| Concrete | Hydrogen peroxide solution | Add sealant post-cleaning |
| Wood | Mild soap/vinegar dilution | Avoid excess scrubbing/moisture |
By addressing hard surface floor mold safely and consistently maintaining clean conditions indoors moving forward will help avoid complications caused by unchecked growth risks over time naturally
The Best Methods for Removing Mold from Exterior Surfaces Like Decks, Patios, and Foundations
Mold on exterior surfaces can not only cause structural damage over time but also create unsightly appearances and health risks. Proper removal of mold from areas like decks, patios, and foundations requires a combination of safe cleaning techniques and preventive measures. Below is a detailed guide to help you restore these surfaces effectively.
Step 1: Inspect the Affected Area
Before beginning the removal process, assess the extent of mold growth. This step allows you to determine whether professional assistance is required or if the issue can be managed safely using DIY methods.
- Light Mold Growth: Small patches or minor discoloration that hasn’t penetrated deeply into porous materials.
- Moderate Mold Growth: Spreading colonies across larger areas with possible staining.
- Severe Mold Growth: Significant coverage with deep penetration into materials like wood or concrete; may require professional intervention.
Step 2: Gather Necessary Tools and Materials
- Protective gear: Gloves, safety goggles, and an N95 mask or respirator.
- Cleaning solutions (store-bought fungicides or homemade options such as diluted bleach or white vinegar).
- A soft-bristle brush for scrubbing.
- A power washer (optional) for outdoor use.
- Absorbent cloths or rags for wiping surfaces.
- A hose with clean water supply.
| Tools Needed | Purpose |
| Protective Gear | Safeguards health during cleaning. |
| Cleaning Solutions | Kills mold spores effectively. |
| Scrubbing Brush | Removes embedded mold in surfaces. |
| Power Washer | Quickly cleans large outdoor areas. |
Step 3: Choose the Right Cleaning Solution
- Use a solution made of one cup of white vinegar mixed with one gallon of water to kill mildew without damaging wood grain.
- For tougher stains, mix three parts water with one part household bleach.
- Clean using a mixture of half a cup of liquid detergent powder in a gallon of warm water.
- For stubborn stains, add one cup of trisodium phosphate (TSP) to this solution for enhanced efficacy.
- Opt for manufacturer-recommended cleaners specifically designed for composite materials to avoid causing discoloration.
Step 4: Apply Cleaning Solution and Scrub Thoroughly
- Wet the surface first using clean water to reduce dust and prevent excessive absorption by porous materials like wood or concrete.
- Apply your chosen cleaning solution generously over affected areas using an absorbent cloth or sprayer.
- Allow it to sit for about 10–15 minutes to loosen stubborn mold deposits before scrubbing.
- Gently scrub any visible colonies with a soft-bristle brush in circular motions until all traces are removed.
Pro Tip: Avoid using metal brushes on wooden surfaces as they may leave scratches that allow future mold growth.
Step 5: Rinse Thoroughly Using Clean Water
- A garden hose for small spaces like decks or stairs.
- A power washer at low pressure settings (especially effective on patios).
Rinsing ensures no residue remains that could encourage regrowth.
Step 6: Dry Properly After Cleaning
- Use absorbent towels where possible.
- Allow direct sunlight exposure when weather permits—it acts as a natural disinfectant while drying out damp structures more quickly.
Preventive Measures Against Future Growth
- Regularly clean outdoor areas every few months—even in absence of visible signs—to remove dirt that attracts moisture buildup.
- Ensure proper drainage around foundations by fixing leaks & directing runoff away from walls/patios/decks toward drains instead. 3 . Seal porous materials annually w/ waterproof coatings prevent further spore penetration
How to Address Mold Growth on Roofs: Tips for Different Materials like Asphalt and Slate
Mold growth on roofs is not only unsightly but can also compromise the structural integrity of your home. Addressing this issue requires a targeted approach based on the roofing material, as each surface has unique vulnerabilities and cleaning requirements. Below, we outline effective strategies for removing mold from common roof types like asphalt shingles and slate.
Understanding the Risks of Mold on Roofs
Mold and algae growth can lead to several problems, including:
– Roof Damage: Mold retains moisture, which can deteriorate roofing materials over time.
– Structural Concerns: Prolonged mold exposure may weaken roof supports, leading to costly repairs.
– Health Hazards: Spores released by mold may affect indoor air quality, potentially causing respiratory issues for inhabitants.
Addressing mold early is crucial to preventing further damage.
General Safety Tips Before You Start
Before tackling mold removal on your roof, keep the following safety tips in mind:
– Wear Protective Gear: Always use gloves, goggles, and an N95 mask to avoid direct contact with spores or inhaling them.
– Use Non-Slip Shoes: Roof surfaces can become slippery when wet or during cleaning procedures. Ensure proper footing to prevent accidents.
– Check Weather Conditions: Opt for a dry day with no strong winds to ensure safety while working at height.
Cleaning Mold from Asphalt Shingles
- Mix a 50/50 solution of water and household bleach (sodium hypochlorite). Add a small amount of dish soap if needed.
- Use a garden sprayer or handheld pump sprayer and apply the solution generously over the affected areas.
- Let the solution sit for 15–20 minutes but avoid letting it dry completely.
- Use a low-pressure hose (not a power washer) to rinse off the solution and dead mold effectively.
Pro Tip: Avoid using abrasive brushes or high-pressure washers as they can dislodge asphalt granules.
Removing Mold from Slate Roofs
- Use oxygen bleach instead of chlorine bleach to prevent discoloration or damage.
- Apply the cleaner with a soft-bristle brush or mop designed for roofing applications.
- Carefully rinse using a hose or low-pressure washer set at safe levels (below 500 PSI).
Note: Do not walk directly on slate tiles as they are prone to cracking under weight.
Preventing Future Mold Growth
| Preventative Measures | Benefits |
| Install Zinc/Copper Strips | Inhibits fungal growth when water flows over strips onto shingles/slates |
| Trim Overhanging Branches | Reduces shaded areas where moisture lingers |
| Clean Gutters Regularly | Prevents water pooling near roof edges |
| Ensure Proper Ventilation | Reduces excess moisture buildup indoors that can seep into roofing layers |
By tailoring your approach based on material type and observing preventative measures, you can effectively manage mold growth on your roof while preserving its longevity and appearance.
Expert Tips from Mold Remediation Professionals Vero Beach FL for Removing Mold from Mattresses Safely
Mold growth on mattresses is not only unpleasant but can also pose health risks such as allergies, respiratory issues, and skin irritation. Tackling mold effectively requires the right approach to ensure the mattress is safely cleaned without compromising its integrity. Below is a comprehensive guide, broken down into manageable steps, to help remove mold from your mattress using safe and reliable techniques.
Step 1: Gather Necessary Tools and Supplies
- Protective Gear: Gloves, mask, and safety goggles to avoid direct contact with mold spores.
- Vacuum Cleaner: Preferably one with a HEPA filter to trap mold particles.
- White Vinegar: A natural antifungal agent.
- Hydrogen Peroxide (3%): For deeper cleaning and disinfecting.
- Baking Soda: To absorb moisture and neutralize odors.
- Soft-Bristled Brush: For scrubbing without damaging mattress fabric.
- Spray Bottles: For applying cleaning solutions evenly.
- Clean Towels or Cloths: Used for blotting excess moisture.
Step 2: Prepare the Mattress for Cleaning
- Move the mattress outdoors if possible. Sunlight helps kill mold spores while providing proper ventilation.
- If moving outside isn’t feasible, ensure good indoor ventilation by opening windows or turning on fans.
Step 3: Vacuum Mold Spores
Using a vacuum cleaner with a HEPA filter: – Thoroughly vacuum both sides of the mattress to remove loose mold spores. – Pay special attention to seams, crevices, and edges where mold tends to accumulate.
Dispose of the vacuum bag or clean the filter immediately after use to prevent spreading spores.
Step 4: Apply a Cleaning Solution
| Solution | Preparation | Application |
| White Vinegar | Mix equal parts vinegar and water in a spray bottle. | Lightly spray infected areas; let sit for 30–60 minutes before scrubbing. |
| Hydrogen Peroxide (3%) | Use hydrogen peroxide directly or dilute with equal parts water. | Spray onto affected areas; let sit for 15 minutes before wiping clean. |
Avoid over-saturating the mattress as excessive moisture can worsen mold growth.
Step 5: Gently Scrub Mold Stains
Using a soft-bristled brush: 1. Scrub gently in circular motions until visible stains fade away. 2. Wipe off residues using a clean cloth dampened with water.
Repeat this process if stains persist.
Step 6: Dry Thoroughly
Proper drying is crucial to prevent future mold growth: – Place the mattress outdoors in direct sunlight or near an open window for airflow. – Use fans or dehumidifiers indoors to speed up drying time if sunlight isn’t accessible.
Sprinkle baking soda over damp areas once dry-to-the-touch; leave it for several hours before vacuuming it off to eliminate any residual odor.
Preventative Tips for Future Mold Growth on Mattresses
- Use a waterproof mattress protector to shield against spills and humidity infiltration.
- Ensure adequate bedroom ventilation by frequently airing out the room or employing dehumidifiers when needed.
- Keep relative indoor humidity levels below 50% using a hygrometer for monitoring.
- Regularly clean your bedding materials such as sheets, covers, and pillows in hot water where possible.
By following these safe techniques and preventive measures diligently, you can maintain both cleanliness and longevity for your mattress while safeguarding your health from potential complications related to mold exposure.
A Complete Guide to Removing Mold from Mattresses with Safe and Reliable Techniques
Mold on a mattress not only damages the material but also poses significant health risks, such as respiratory issues and allergies. Addressing this issue promptly and safely is essential. Below is a comprehensive guide to removing mold from mattresses using proven techniques that prioritize safety and effectiveness.
Step 1: Gather Necessary Tools and Materials
- Vacuum cleaner with a HEPA filter
- Mild detergent or specialized upholstery cleaner
- White vinegar or hydrogen peroxide
- Baking soda
- Clean cloths or sponges
- Spray bottle
- Protective gloves, mask, and goggles (to protect against spores)
Step 2: Safety Precautions Before Cleaning
- Work in a well-ventilated area – If possible, move the mattress outdoors to minimize spreading mold spores indoors.
- Wear protective gear – Use gloves, a mask, and goggles to reduce your risk of exposure.
- Inspect the mattress thoroughly – Identify areas with visible mold growth and note any musty odors that may indicate hidden mold.
Step 3: Clean Surface Mold Using a Vacuum Cleaner
Use a vacuum cleaner equipped with a HEPA filter to remove loose mold spores from the surface of the mattress. Run the vacuum over all sides of the mattress, paying close attention to seams where spores may collect. Dispose of the vacuum bag immediately after use in an outdoor trash bin.
Step 4: Drying Your Mattress Thoroughly
- Place it in direct sunlight if weather permits; sunlight helps kill remaining spores.
- Use fans or dehumidifiers indoors if drying outside is not an option.
- Avoid making up your bed until you’re certain there’s no residual moisture.
Option 1: White Vinegar Solution
- Mix equal parts white vinegar and water in a spray bottle.
- Lightly spray the affected areas without soaking the mattress.
- Let it sit for 30 minutes before blotting with a clean cloth.
Option 2: Hydrogen Peroxide Solution
- Combine one part hydrogen peroxide with two parts water.
- Apply using a cloth or sponge, gently dabbing the stained areas.
- Allow it to sit for 15–20 minutes before wiping clean.
Option 3: Baking Soda Treatment (For Odor Control)
- Sprinkle baking soda generously over dampened areas treated with vinegar or peroxide.
- Let it sit for several hours or overnight if possible.
- Vacuum thoroughly after it has dried.
| Solution Type | Ideal For | Precaution |
| White Vinegar | General mold removal | Avoid over-saturation |
| Hydrogen Peroxide | Tough stains | Test on small area first for discoloration |
| Baking Soda | Odor neutralization | Can be combined with other treatments |
Preventing Future Mold Growth
- Use a waterproof mattress protector to create an extra barrier against moisture.
- Keep humidity levels below 50% in your bedroom using dehumidifiers when necessary.
- Ensure proper ventilation by opening windows regularly or using exhaust fans.
- Rotate or flip your mattress periodically so that no single side remains damp for extended periods.
By employing these safe and reliable techniques, you can effectively restore your mattress while reducing health risks associated with mold exposure—ensuring you sleep on a clean and healthy surface again soon.
- How Mold Remediation Professionals Vero Beach FL Address Water Damage and Prevent Mold Growth
- Mold Remediation Professionals Vero Beach FL: When to Call Experts Instead of Using a DIY Kit
- Mold Remediation Vero Beach: What It Is and Why It’s Important
- Effective Tips for Mold Removal Vero Beach: Say Goodbye to Stains on Textiles and Fabrics
- Effective Mold Removal Vero Beach: Understanding the Water Damage Restoration Process
- Understanding Mold Remediation Vero Beach and Its Impact on Your Health